Monday, December 26, 2011

Thank You with Wildflowers


I hope that everyone had a festive, magical and worshipful Christmas!!

It's a season full of generous acts, wonderful gatherings of family and presents, and special gifts - so for my post today, I wanted to say "Thank You" to all of my friends and family and even the strangers with a ready smile and a kind word.


I used the sketch from Freshly Made Sketches.

  • Stamps: Sweet 'n Sassy Wildflowers, Beauty in the Sea (sentiment)
  • Paper: Stampin' Up Always Artichoke, Cherry Cobbler, Very Vanilla, K&Co Julianne dsp
  • Ink: Stampin' Up Always Artichoke, Old Olive, Cherry Cobbler, Poppy Parade, Tim Holtz Old Paper Distress Ink
  • Accessories: Nestabilities label, Stampin' Up Artichoke seam binding, Mr. Huey's Calico Shine mist, misc pearls

Saturday, December 24, 2011

Less Is More: One Word and One Word Only!!

This week's challenge at the Less Is More blog is to use Just One Word.  You can decorate around it - but only one word.  I HAD to play because I just received a Papertrey Ink order that included their Wonderful Words dies. 

If you look closely - the word is cut into the white cardstock and then the piece is backed with the pomegranate.  The problem with this is that I had to use tiny tweezers and a glue pen to stick all the center pieces of the letters.  It made this card slightly less than truly simple.  We will be doing this at our church card group in January and my plan is to cut the word out of the pomegranate CS and glue it to the white - completely avoiding the hassle.  I don't think it would make a significant difference, do you?


  • Stamps: Papertrey Ink Heart Prints
  • Paper: Stampin' Up Purely Pomegranate, Rose Romance (both retired)
  • Ink: Stampin' Up Rose Romance
  • Accessories: Papertrey Wonderful Words die, Martha Stewart heart punch, Stampin' Up Pretty in Pink Gingham

Friday, December 23, 2011

i{heart}2stamp: Unselfishness

I have been playing along with Jen's i{heart}sketches all year long and this is my card for the final sketch.


I normally follow sketches almost exactly.  I know they are supposed to be an inspiration and we are to use our creativity, but I find it more of a challenge to come up with ideas to make the exact sketch work.  But I broke my own "rules" this week - I flipped the sketch sideways, I used a standard sized card instead of a square and the three circles became three clouds!


The stamp is from Eat Cake Graphics.  Years ago, I made a Christmas card for our church card rack - the image on the card was so popular that I have had people request cards with this image every year since.  If you want a good chuckle to start your day - check this out!  (BTW - this image and other popular Eat Cake Graphics images are also available in quilt patterns.  That's one hobby I refuse to even try because I seem to fall in love with EVERYTHING I try and I have enough card supplies, knitting yarn and patterns, and...going back in time...cross stitch floss, cloth and patterns to last a dozen lifetimes!)

By following along with Jen's sketches all year, I am eligible for a prize package - but to qualify, I need to list all of my previous posts here.  If you are a follower, you have seen all of these before - but I need to show Jen that I did it!!  Fingers crossed!!

January: With Love From Me to You
February: B is for Birthday
March: Asian Artistry
April: Field Birds AND You're a Star
May: Bird Cage in Brights
June: Hang in There
July: Colorful Kite
August: A Nostalgic Halloween
September: Musical Bird
October: Winter Owls
November: Snowman with Copics

For today's card:
  • Stamps: Eat Cake Graphics, Hero Arts Envelope Background (cloud pattern), sentiment is a part of a stamp from Stampin' Up's Very Punny
  • Paper: Stampin' Up Baja Breeze, Daffodil Delight CS and dsp, Lucky Limeade
  • Ink: Colorbox Frost White, Memento black, Copics
  • Accessories: Papertrey Ink Cloud Dies, Nestabilities circle and zigzag circle, Martha Stewart grass border, Stampin' Up Baja ribbon and Round Tab Punch

Check out this post for Copic tips and hints

Wednesday, December 21, 2011

Let Go & Let God

I was pawing through my supplies looking for something entirely different when I came up with this stamp and it spoke to me.  I have had a very difficult time this year letting go of my own expectations of my life. 
  • I have an unemployed husband (but no worries, we are in MUCH better shape than so many others in this situation - I am just tired of having him around the house!!). 
  • My oldest son is now home being home-schooled (a blessing - but I am already tired of having him around the house too!!) 
  • I'm heading back to school to freshen my credentials to find employment so I can get out of the house since everybody else seems to be here!! (I did have a career prior to a family, but it's been 12 years)
I had definitely envisioned a more stable and relaxed life.  (Of course, I had also envisioned myself 30 pounds lighter - but I am working on that!)

Life really isn't bad...I have my God by my side and I know with all my heart that He has a plan for me.  But I do have to be reminded of that once in awhile - even if it is by a rubber stamp!!


  • Stamps: Sweet 'n Sassy Let Go, Let God and Serene Silhouettes
  • Paper: Stampin' Up Groovy Guava, Early Espresso, Afternoon Tea dsp
  • Ink: Stampin' Up Groovy Guava, Wild Wasabi and Early Espresso
  • Accessories: Nestabilities Circle and Scalloped Circle, Martha Stewart ribbon

Saturday, December 17, 2011

LIM: Variations on a Theme

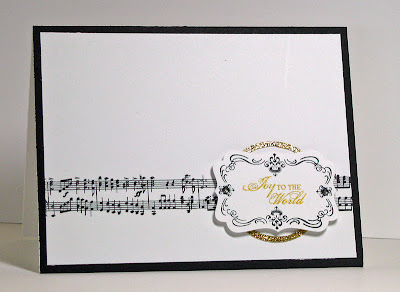
The Less Is More challenge for this week is a theme challenge - music - and I decided to do Variations on a Theme (tee-hee).  How could I not do a music challenge given my living room has been converted to a music room to hold the piano, the organ, the saxophone, the clarinet, the trumpet, the snare drum, the hammered dulcimer, the bowed psaltery, the accordian (really!), and a myriad of records, penny whistles, harmonicas, etc.

I started out with the Stampin' Up Music Notes border.  (NOTE: I only have it digitally - so this may not be the size that it is in real rubber!)  First, I added the bird from Four Frames.


I had extra music note border pieces printed out and I still needed a couple of Christmas cards, so I went very clean, simple, yet regal for this card.


And I still had a border piece left so I prepared ahead with a card for my teenage saxophonist.  I'm sure he will have a concert in the near future for which I will need a congratulatory card!


Isn't it just a wonderful season for music???  I have multiple Christmas playlists on my iPod and I just had one of my children who wanted to earn some cash go through all of my Christmas music, find all of it that was between 115 and 125 beats/minute and create a new playlist that I can use this walk to go on brisk walks!!  Of course, I have been busy this morning with this challenge and with finally addressing and stamping and signing all of my Christmas cards - so haven't walked yet!  But I am ready to go now!!

  • Stamps: Stampin' Up Four Frames, Jazzed Up, Verve Winter Wonder (Joy to the World)
  • Paper: black, white, Stampin' Up Marina Mist, Rich Razzleberry, Best Creations Gold Glimmer
  • Ink: black, Delicata Golden Glitz, copics
  • Accessories: Stampin' Up Label Punch, Scalloped Circle Punch, various circle punches (to do the "halo"), nestabilities rectangle and scalloped rectangle

Thursday, December 15, 2011

Love Notes from Cocoa

Sweet 'n Sassy is celebrating Cocoa Mouse with a blog hop!!  If you are following along - you should have come from Bridget's blog.  If you just happened on my blog and want to see lots more Cocoa cards, click back to the beginning - the Sweet 'n Sassy blog - to enjoy them all!

As I was looking through my Cocoa stash and trying to decide what type of card to make - I realized that as much as I love Christmas cards - I am really tired of red, green, gold and glitter! So I pulled out Love From Cocoa and made a very clean and simple card with all the sweetness of Cocoa!


The Lacey Border Die is also a Sweet 'n Sassy product - isn't it a great accent??! 

Behind Cocoa is a fun look that utilizes Nestabilities - cut a scallop circle and an inverted scallop circle (a different set of dies) - they layer together for this fun "beaded" look.

To add to the blog hop excitement - we want YOU to hop along with us!  All you have to do is make a card or project with Cocoa Mouse and add your direct link on any of our blogs - and it will show up on all of them!!  (Linky tool is at bottom).  One participant (drawn at random) will win their choice of ONE free Cocoa Mouse clear stamp set or FOUR free Cocoa Mouse digis.  You have until Saturday, December 17 at 11:30 p.m. EST to add your link.


And even more excitement - during the month of December we really are Crazy 4 Cocoa.  The entire line of Cocoa Mouse clear stamp sets and digi images are 10% off!

I have had so much fun this month playing with Cocoa Mouse images.  I hope you are having a wonderful time on our hop and getting lots of new ideas.  Next on our hop is Harriet.

Here is the whole list of design team members hopping along today:

Kim Singdahlsen <----YOU ARE HERE!


Wednesday, December 14, 2011

Gifts for Friends, Teachers, Pastors...

My wonderful family sat around yesterday running the Cuttlebug (my teenager actually got a Cuttlebug injury!!) and rounding corners (it will be interesting to see if my husband can use his thumb after punching 720 corners!!) while I stamped.  The goal was to complete gift packages for all of those special people in our lives - teachers, pastors, friends, etc.

Of course, we had to keep it clean and simple to finish it all, so here is a set of 4 birthday cards that we will be giving to all of those important people.


The cards took so long, that I didn't have much time to come up with fancy packaging, so I got clear boxes from a paper supply store, used my computer for the sentiment and a variety of dies to create a little tag.


  • Stamps: Sweet 'n Sassy Happy Birthdays (all in one handy set!), Stampin' Up Posy Punch and Triple Treat Flower
  • Paper: Stampin' Up Cherry Cobbler, Summer Sun, Old Olive, Baja Breeze
  • Ink: ditto
  • Accessories: Cuttlebug embossing folder, Stampin' Up flower punch and Sweet Buttons Sizzlit, Martha Stewart butterfly punch, Marvy Uchida button punch, Papertrey Ink tag and holly dies, misc gingham ribbon, black gems and crochet thread

Tuesday, December 13, 2011

Deck the Halls with Taylored Expressions

Amongst many other fabulous products, Taylored Expressions has a wonderful series of wreaths for all seasons (plus die) and banners (plus dies).  I recently got the Christmas set and now I am crossing my fingers for a sale for the holidays because I want the rest of them.  So very sweet and detailed enough to make very interesting cards!


I used the classic Christmas colors from today's Splitcoast Color Challenge: Crumb Cake, Cherry Cobbler and Always Artichoke.

  • Stamps: Taylored Expressions Wreaths of Joy, Banner Holidays, It's a Banner Day 1
  • Paper: Stampin' Up Crumb Cake, Always Artichoke
  • Ink: Memento Black, copics, Stampin' Up Crumb Cake, Cherry Cobbler
  • Accessories: Cuttlebug embossing folder, Taylored Expressions wreath and banner die, SU Cherry Cobbler seam binding, Nestabilities, Glossy Accents, Gold Stickles 

Monday, December 12, 2011

Chilling Out with Snow and Humor

This is my second post today.
The first post has tips and hints on glittering.

The Splitcoast Clean and Simple challenge was to Chill Out!  I am definitely feeling the need to chill so I did it on my card in two ways - a lot of snow, and a surprising and fun sentiment!


Do you like that pretty scene??  Check out what is hiding behind the door!!


(I'm trying really hard to get past the grammatical error in the sentiment.  The way that this is written, it is comparing your lawn with your actual neighbors - the older gentlemen, the family, the annoying teenagers - it says those people look like your lawn!!  A simple apostrophe in neighbors and it will accurately compare lawn to lawn.  I'm going to try to draw one in but I wanted a photo before I flubbed my apostrophe!)

My first post today gave a step by step tutorial on glittering.  I used that method to do the lawn and the trees.    But to do the blue edges, I didn't want to waste glitter on the entire sheet.  In this case, a 2-way glue pen is perfect.  It's very easy to draw a line of glue down the edge.  (These glue pens must have ridges or something because they "grip" onto the edge and keep everything straight.)  Then just dip your edge into your Tupperware of glitter (see previous post).


  • Stamps: The Stampin' Place sentiment, unknown snowflakes
  • Paper: Stampin' Up Baja Breeze
  • Ink: Stampin' Up Baja Breeze, Basic Gray
  • Accessories: Cuttlebug embossing folder, Martha Stewart Crystal Fine Glitter, Stampin' Up window Sizzix die, Emaginations tree punch

Glitter, Glitter Everywhere!!

I promised every one yesterday that I would do a post on glittering. Some of you got a little excited and then I started getting embarassed, because my tips are SO basic and easy.  I had to remind myself that that's what I love to do on my blog!

A year or so ago, I was with three very experienced cardmakers and we were watching one of them do something very basic but in a way that was new to all of us - and the rest of us just shook our heads and said "why didn't I think of that"?  That moment made me aware of the fact that we often get so focused on new tools and techniques that sometimes we overlook the basics.  So here are my basics of glittering.

Here's the card...


First, I am at heart a clean and simple cardmaker - so easy is ALWAYS better.  I almost never glitter small, detailed parts of the image.  I typically glitter the entire image panel or, at most, a large portion of the image.  This keeps it simple.

Second, get a large bottle of glitter (see recipe at bottom).  Then dump your bottle into a flat, square Tupperware.  I don't know about you, but I spent a lot of years carefully sprinking glitter onto my image, then tapping it off onto a scrap paper, then using that scrap paper to funnel the glitter back into the bottle.  Putting it in a Tupperware makes it so much easier!  My Tupperware stays full of glitter year round!


Third, pull out your create-a-sticker machine.  I know many, many crafters have this sticker-making machine, but few of us actually use it. Mine is only ever used for glittering, but it's an inexpensive machine and so worth it for this process!

The steps are simple....

Put your image (or in this case, my patterned paper) through the Xyron UPSIDE-DOWN so the sticky ends up on the top surface.

Roll it through the machine and it comes out face-down on the paper.  (This is terrible paper to demonstrate with because there is pattern on both sides.  I am glittering the polka-dot pattern which is on the other side.)


Peel it off and dump it in your Tupperware of glitter and you have a totally glittered square of paper!


I also glittered the ornament on the Cocoa image.  Larger portions of an image are also quite easy to do using the same techniques.  All you have to do is create a reverse mask.


Put your masked image, face-down, through the Xyron.


Peel off the mask and dump the image into your Tupperware of glitter.


As with all basic techniques some of you have been doing this all along.  Some of you may have even easier ways of doing it.  But some of you just had a light bulb come on.  I know that I did the first time that I saw glitter in a Tupperware!!

I hope you all can find time these last few busy holiday weeks to get good and glittery!!!

  • Stamps: Sweet 'n Sassy A Cocoa Kind of Christmas
  • Paper: Stampin' Up Melon Mambo dsp and CS, Lucky Limeade dsp and CS, Tempting Turquoise dsp
  • Ink: copics
  • Accessories: silver "pearls" from Michaels, Nestabilities Oval and Lacey Oval, Stampin' Up embossing folder, Creative Impressions snowflake brads, misc white grosgrain and silver cord, Martha Stewart Crystal Fine Glitter (4.5 oz. bottle - it's big!), Xyron 2.5" create-a-sticker machine
  • Challenges:
          Inkspirations Sketch Challenge:


          Just Add Ink:  (My apologies to the Just Add Ink ladies if you have to remove my link.  JAI has a strict no advertising policy.  I re-read their rules and it says you can't LINK to a product so I made sure not to link anything.  But I did obviously mention a couple of product so I totally understand if you have to remove my card.  However, I was so inspired by the colors and the silver balls in your photo that I definitely wanted to mention the challenge!)

Sunday, December 11, 2011

Freshly Made Sketches: Merry Snowflake!

I was playing at a girlfriend's house yesterday...she has more Stampin' Up stuff than I do!!  (But I have her beat on every other brand of stamps.)  I had Serene Snowflakes out and found some paper scraps in her stash.  It all seemed perfect for this week's Freshly Made Sketch.


I go through SO much glitter during the holidays...I LOVE "frosting" image panels.  I do have a post written and scheduled for tomorrow that shows a very simple way of doing this. 


  • Stamps: Stampin' Up Serene Snowflakes, Tiny Tags
  • Paper: Stampin' Up Real Red, Old Olive, Very Vanilla, SU dsp
  • Ink: Stampin' Up Real Red
  • Accessories: Stampin' Up Old Olive Taffeta, Emaginations Snowflake punch, SU Jewelry Tag, Martha Stewart Crystal Fine Glitter

Saturday, December 10, 2011

CAS-ual Misting: Heartfelt Sympathy

When this week's CAS-ual Friday challenge came up as using mist, I laughed.  I don't do mist.  I TRY to do mist.  But it's just too uncontrolled and random for me.

Unfortunately for me, right after I laughed, an image popped into my mind.  I need sympathy cards for our church card racks and I imagined a silhouette flower with a mist making it hazy.  I saw a gray card with a white mist - after 4 or 5 failed attempts - I changed to the colors in my current card.  (And I'm not even going to tell you how many times I stamped and then didn't like the misting!!)


The above picture really doesn't do it justice.  The cardstock is Papertrey Ink's Fine Linen which is fast becoming one of my go-to neutrals.  It can be used like a kraft but it's got a warmer tone to it (less gray than this picture looks).  So it seemed natural to use a golden mist.


And once again, I have to say, this is why I love challenges.  My mist NEVER comes out - but I am very happy with this particular card! 
  • Stamps: Stampin' Up Just Believe, Close As a Memory
  • Ink: Black
  • Paper: Papertrey Ink Fine Linen, Black
  • Accessories: misc gold balls, Tattered Angels Gold Glimer Mist

Wednesday, December 7, 2011

Sharing a Cup of Tea

I love the idea of slowing down for awhile during this holiday season and sharing a cup of tea with a friend.  However, that friend would definitely not be a mouse!!  Not even the darling Cocoa Mouse!


My plan for this card is to include a tea bag and to invite a friend for a small break from the holiday madness!!

I used this week's color challenge at Splitcoast: Very Vanilla, Wild Wasabi and Real Red.  And I used the The Sweet Stop Sketch Challenge.


Cocoa Mouse is this month's focus at Sweet 'n Sassy Stamps - the whole line is 10% off through December!!  Cocoa has stamps for holidays, seasons, birthdays, summer vacations and more!  I have some Valentine Cocoa stamps that I will be sharing next week!

  • Stamps: Sweet 'n Sassy Tea Time Cocoa
  • Paper: Stampin' Up Very Vanilla, Wild Wasabi, Real Red, Candy Cane dsp, Red Glimmer CS
  • Ink: Memento black, copics
  • Accessories: Stampin' Up Very Vanilla Taffeta, Spellbinders circle and oval, EK Success Border Punch, Martha Stewart Crystal Fine Glitter

Monday, December 5, 2011

Twine, Unique Colors and a Gift Sketch

I generally don't put more than a couple of challenges together - I'm just not talented enough to see which ones work well together!  But today, I saw the CAS Challenge at Splitcoast (use twine) and I remembered the Stamping 411 Sketch which looked like a gift.  Then, as I was scrounging through my Christmas papers for a center panel for the gift sketch, I came across a pack of paper from Stampin' Up then I had not even opened - probably because it had very nontraditional colors - just like was required by this week's Paper Players Challenge!


  • Stamps: Stampin' Up Just Beclause
  • Paper: Stampin' Up Blushing Bride, Candy Cane Christmas dsp
  • Ink: Stampin' Up Basic Gray, copics
  • Accessories: misc baker's twine, Stampin' Up Oval Punch

Sunday, December 4, 2011

Freshly Made and colourQ: Reindeer and Ornaments

I like to play along with Freshly Made Sketches as often as possible.  They have a requirement that the card be "clean" - not necessarily simple - and that is exactly my style.

With this week's sketch, I pictured Christmas ornaments.  Then I decided to go a unique direction and pair it withe blues in this week's colourQ challenge.

That's when things started getting out of control!!  Wouldn't the background look nice with some white, sparkly spritz.  Then I should sponge the edges.  Then I needed to add some glitter to the top of each ornament because of the snow.  And pretty soon this card was out of my personal definition of  "clean"!  But I LOVE it - it's one of my favorite Christmas cards this year.


I spritzed it with Mr. Huey's sprays - both Calico White and Calico Shine.


Here's the sketch....
Here's the colors...


So I decided that I wouldn't be posting that card for Freshly Made and I had to make another.  I'm going to show you both of them in this post so you can see how wildly different cards can be made with the same sketch.  (I recently read a blog post...not one of my faithful followers/commenters so no one take offense...that stated how much she hated sketch challenges because they were so limiting.)  Limiting??!!  Check out this card and see how "limited" that I was...


An entirely different look, isn't it??

The reindeer is from an old Stampin' Up set called Holiday Sampler.  I found it when I was rummaging around for a sentiment for the first card - it was literally dusty!!  So I simply had to use it.

I ran a glue pen around the edge of each piece and dipped it glitter for a subtle shine.


Of course, any one who dislikes sketch challenges is obviously wrong...but it's OK that I really dislike inspiration challenges!!

THREE ORNAMENTS:
  • Stamps: Stampin' Up Oh My Word (ornament), Season of Joy (sentiment)
  • Paper: Stampin' Up Whisper White, Sahara Sand, Marina Mist
  • Ink: Stampin' Up Night of Navy, Marina Mist, Bashful Blue, Sahara Sand, Colorbox Frost White
  • Accessories: Mr. Huey Calico White and Calico Shine, Martha Stewart snowflake border punch, Stampin' Up Marina Mist Taffeta, sparkly twine and Decorative Ornament Punch (just the top)
RUDOLPH AND HIS PALS:
  • Stamps: Stampin' Up Holiday Sampler, Teeny Tiny Wishes
  • Paper: Stampin' Up Garden Green, Frostwood Lodge dsp, Red Glitter Paper
  • Ink: Stampin' Up Soft Suede, Crumb Cake, Cherry Cobbler
  • Accessories: Stampin' Up Cherry Twine, Garden Green Grosgrain, Oval punch, border punch, label and modern label punch, Cuttlebug snowflake folder