Showing posts with label calendars. Show all posts

Monday, November 26, 2018

Taylored Expressions: 2019 Calendars

I have so many friends and family on my Christmas list for whom we don't really buy gifts - but I definitely want them to know that they are on my mind.  A hand-crafted gift is the perfect way to say I love them!  Sometimes, I'll box up a variety of my cards for their use.  For others, a calendar is just the right way to go because every day they will know that my thoughts are with them.

Taylored Expressions has the perfect line of products to create calendars.  Recently, they have done a series of posts showing each type of calendar: a desk calendar (with a wonderful new set of border dies), a mini-tear offa 3x4 calendar, then they used my calendar (which I'll detail more below) to show their 5x7 calendar.

Here's an example of the 5x7 calendar:
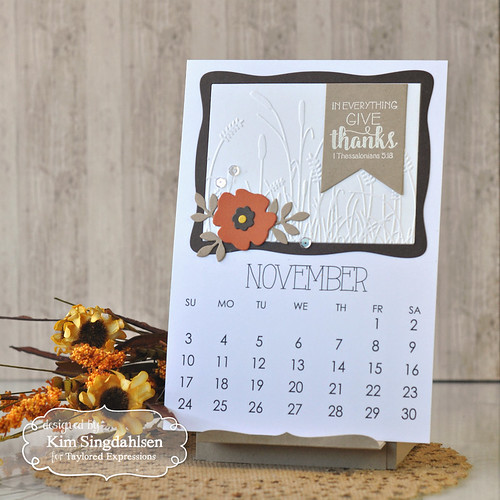
Taylored Expressions 5x7 Calendar

I especially like this size because they can easily be re-purposed.  I give the recipient instructions to cut off the top - then I give them some pre-folded cards for them to glue that top to and they have a greeting card! (Don't forget envelopes!)  It's not perfectly sized so you have to play around with it a little bit.  When you cut off the top, it's around 3 1/2" by 5" which isn't a standard card front so you'll have to experiment a bit.  Last year, I put a coordinating 1" strip of patterned paper across the bottom of my pre-folded card fronts to balance out the odd size. 

To do 12 months of calendars, you have to have a plan of attack - remember that you have 12 little works of art to make for each recipient! (Another option is to send each month's calendar throughout the year - that's definitely a thoughtful gesture.)

This year I decided to use embossing folders to easily add impact. (For years, I ran a church card making ministry.  We could have 40 ladies in an evening - usually 30 of whom had never made a card.  I found it surprising, but the "technique" that they found almost miraculous were dry embossing folders.  I think as a long-time crafter, I knew embossing folders were easy so it seemed like nothing to marvel at.  But this group always got wide-eyed at the results.  So how perfect for this calendar project!)

Then I decided to use the Be Still stamp set.  It was specifically created with 12 months of verses!  Finally, for a pop of color, I added a flower from the Bloomers collection.

I laid out each of the 12 months on my desk - decided on an embossing folder, a verse, a flower and colors. From there, I could do an assembly line!

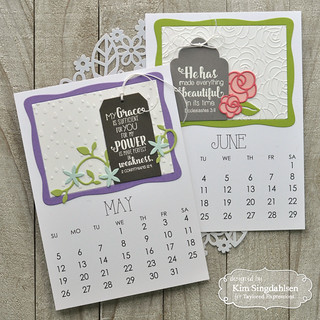
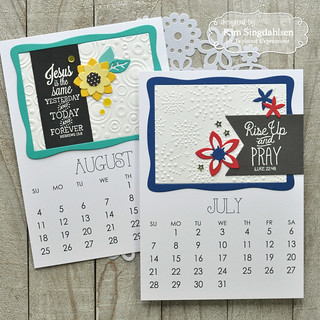
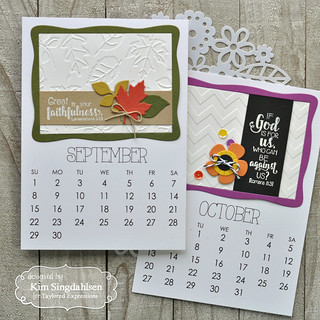
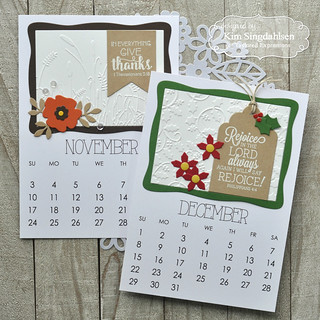
Here's what I came up with for each month - scroll on through because I have some other tips and hints at the bottom.
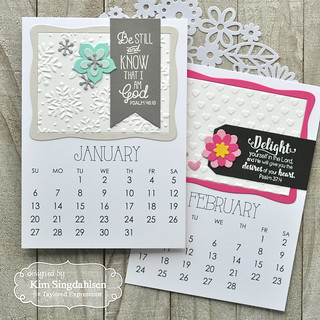
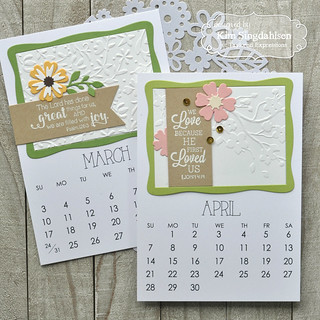
Taylored Expressions 5x7 Calendar

A few suggestions to get this done easily (and a few things I learned along the way)
  • I used a variety of banners, tags and cardstock strips to add variety. It would be faster just to use strips of cardstock to avoid die-cutting, in other words, do them all like September and October. It still looks fabulous! 
  • If you do cut tags, stamp and heat emboss the sentiment first, then cut them - it's much easier to line up a die (because you can see through it) - than using a tool to get the sentiment stamped straight on a pre-cut tag.
  • The next time I do this, I probably won't heat-emboss the sentiments.  I love the look, but it's seriously time-consuming.  I'd do the sentiment strips in basic Sugar Cube, then I'd stamp them in a coordinating color to the frame.  That would definitely speed up the assembly line.
  • For the assembly line - I cut the frames from Build a Scene - Calendar - 5x7, then I cut the inside of the frame with Sugar Cube to give me the panel to emboss.  It would have been much easier to just use my paper cutter to cut the insides instead of running the die through 12 times.  The inside is 3x4.  Another option is to cut the insides a scant 3 1/4" by 4 1/4" so that the frame sits on top and gives some dimension.
  • Of course, I did this for where I live.  You could switch up seasons, or Thanksgiving, or skip the 4th of July.
  • There are so many wonderful basic embossing folders....  you do not have to have a seasonal folder with so many alternatives.
I used the Display Easel dies for a stand.  With all of the layers of the cardstock, it's a bit heavy for the easel.  I solved that in two ways.  First, there's a die for the lip to hold the calendar.  Cut two of those, flip one upside down and use it under the regular lip as extra support.  If you look just below the "27" on the next picture, you can see just a hint of the cardstock support piece.  I also cut two cardstock pieces, approximately 1" x 3" and adhered them from front to back to hold the legs and keep them from sliding apart.  (This piece of advice makes more sense if you see the die!)  FYI - a clear desktop acrylic frame would make the display of these much easier but be careful of dimension if you use this idea.
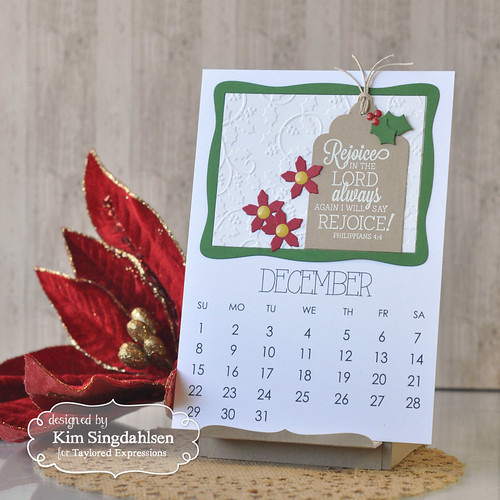
Taylored Expressions 5x7 Calendar

Are you feeling overwhelmed?  It's really not as complex as it looks.  And once you get it all planned out (and learn from my mistakes), these are really quick and easy but give amazing impact!  My supply list is below - but if you want the excruciating details, I have the items for each calendar listed below it.
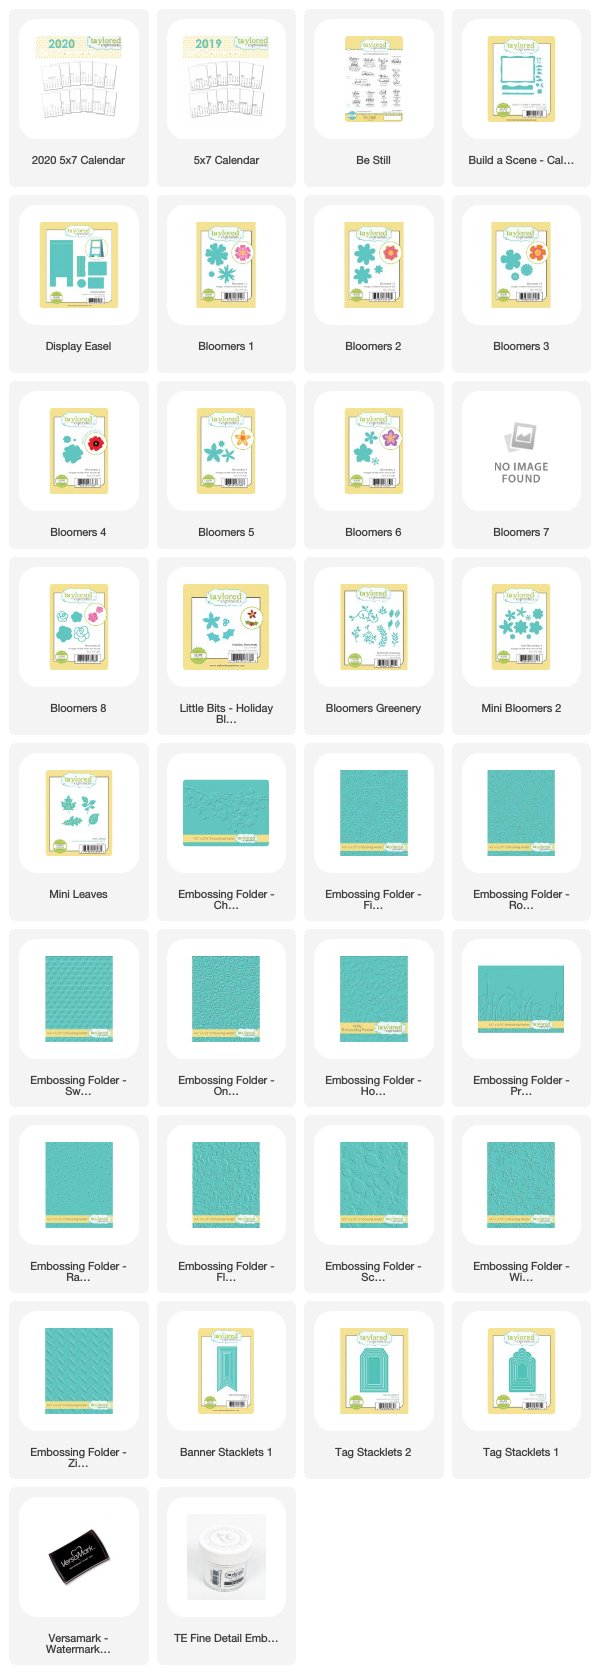
SUPPLY LIST:


BY MONTH:

General:
2019 5x7 Calendar
Be Still stamps
Frame from Build a Scene - Calendar - 5x7
Sugar Cube Cardstock
Fine Detail White Embossing Powder with Versamark

January:
Sea Salt Frame
Banner Stacklets 1in Earl Grey
Winter Flurry Embossing Folder
Bloomers 6 in Confetti Cake, Salt Water Taffy and Silver Metallic

February:
Lollipop Frame
Tag Stacklets 2 in Oreo
Swiss Hearts Embossing Folder
Bloomers 2 in Strawberry Milkshake, Lollipop, Lemon Meringue
Strawberry Milkshake Enamel Shapes Hearts

March:
Peapod Frame
Banner Stacklets 1 in Toffee
Floral Vine Embossing folder
Bloomers 1 and Bloomers Greenery in Pineapple, Sugar Cube, Chocolate Truffle and Peapod

April:
Granny Smith Frame
Toffee behind sentiment
Cherry Blossoms Embossing Folder
Base flower from Bloomers 1 and the center from Bloomers 5 using Pink Champagne and Shimmer White (trying to look like a Cherry Blossom!)
Harvest Sequins

May:
Jelly Donut Frame
Tag Stacklets 2 in Poppy Seed
Raindrops Embossing Folder (I know that April showers bring May flowers - but Easter is in April so I pushed the Raindrops to May.)
Mini Bloomers 2 and Bloomers Greenery in Salt Water Taffy and Granny Smith

June:
Lime Zest Frame
Tag Stacklets 1 in Earl Grey (trimmed to be shorter)
Rosy Posy Embossing Folder
Bloomers 8 in Guava and Pink Champagne, Bloomers Greenery in Lime Zest

July:
Blueberry Frame
Banner Stacklets 1 in Poppy Seed
Fireworks Embossing Folder
Bloomers 5 and Mini Bloomers 2 in Watermelon and Blueberry
Build a Scene Halloween sequins

August:
Blue Raspberry Frame
Oreo behind sentiment
On the Spot Embossing Folder
Bloomers 7 and Bloomers Greenery in Lemon Meringue, Potato Chip, Cookie Monster, Blue Raspberry and Playful Patterns - Black & White
Hello Sunshine sequins

September:
Sweet Basil Frame
Toffee behind sentiment
Scattered Leaves Embossing Folder 
Mini Leaves in Dijon, Pumpkin and Sweet Basil (The plan was a year of flowers - but how could I not do leaves for September??)

October:
Plum Punch Frame
Oreo behind sentiment
Zig Zag Embossing Folder
Bloomers 3 in Candy Corn, Lemon Meringue and Oreo
Plum sequin from Build a Scene Halloween, orange sequin from Harvest, yellow sequin from Rainbow Brights

November:
Chocolate Truffle Frame
Banner Stacklets 1 in Toffee
Prairie Embossing Folder
Bloomers 4 and Bloomers Greenery in Sweet Potato Pie, Chocolate Truffle, Lemon Meringue and Toffee
Snow Flurries sequins

December:
Cilantro Frame
Tag Stacklets 1 in Toffee (trimmed to be shorter)
Holly Embossing Folder
Little Bits - Holiday Bloomers in Red Pepper and Cilantro
Lemon Meringue and Cherry Pop Enamel Shapes

Monday, October 30, 2017

TE Sneak Peek Day 1: Christian Calendar

It's the first day of sneak peeks for the November release from Taylored Expressions!  This is one of my favorite releases as it is traditionally focused on calendars and gift-giving.  Both are so fun to create and to give!  Everything you see in the next three days of sneak peeks will be available on Thursday, November 2nd. Be sure to check out each of the creative team members' blogs for all of the sneak peeks - starting with the Taylored Expressions blog.

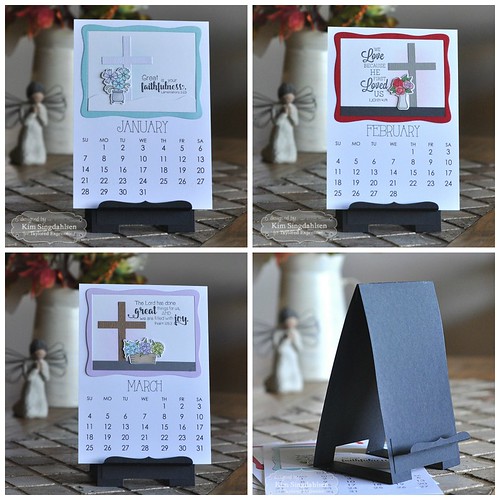
Here's January from my calendar series.

Taylored Expressions Be Still - Jan

{I have more months later in this post.}

You can see that these are new 2018 5x7 calendars.  There are also 3x4 calendars and mini tear off calendars.  I used many previously released products for my calendar - the stamp set Be Still which has 12 Bible verses, the stamp set and the dies for Flower for a Year - 12 of those too so just perfect for a calendar.  To decorate, I used the previously released Build a Scene - Calendar - 5x7 die set and the Old Rugged Cross die set.  So you might be asking, what's new?

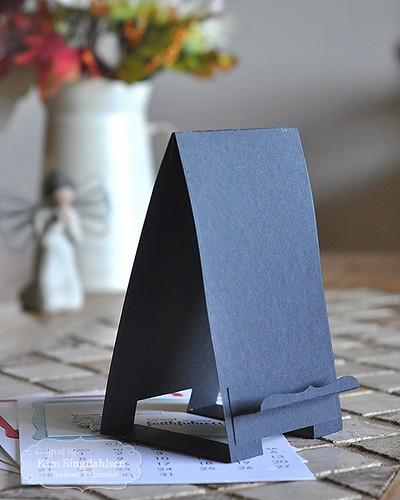
It's the Display Easel!!!  Be still my heart - I see SO many uses for this die set.

Taylored Expressions Display Easel die set

FYI - I attached an extra piece of 1x3 cardstock across the two base legs to widen and stabilize it.  I was worried that with the bigger calendar it wouldn't be stable particularly if I bumped my desk.  (Yes, I'm keeping this one for myself! But I'm already thinking of friends and family who will be getting a calendar set also.)  I also added another piece below the shelf to keep it sturdy.  The calendars are printed on sturdy cardstock and I didn't want to take any chance of the easel drooping!

You definitely need to pop around to the other blogs so see all of the uses for this easel.  You will see watercolor panels and you'll see smaller calendars with a different way to build the easel.  You'll also see the new stamp set.  (Grumplings fans, get excited - we now have Calendar Grumplings.)

And to add to the excitement...For a limited time, earn DOUBLE CRAFTY POINTS on our Display Easel die! If you're not a Crafty Points member, it's free and easy to join. Just create an account at the TE webstore and you're automatically enrolled to begin earning crafty points with every purchase. You'll earn 74 Crafty Points on the purchase of our Display Easel die! Offer valid on qualifying purchases made between 9am CST on Thursday, November 2, 2017 and 11:59 pm CST on Sunday, November 5, 2017 and only while supplies last. Crafty Points are only available on purchases made via our retail site: www.tayloredexpressions.com.

I am a huge fan of inspiration on my calendar so I can feel positive and motivated each time I check the date.  I am thrilled to continue with the Be Still and Flower of the Year set.

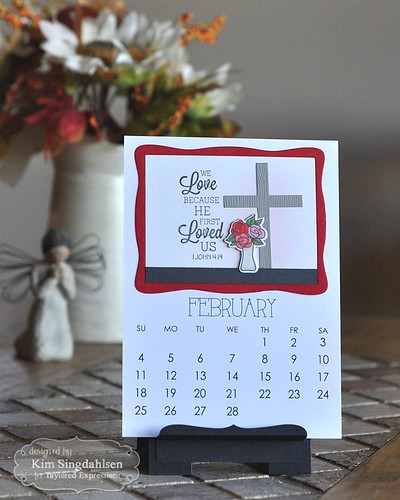
While January was cool and frosty, February uses the "love" theme and a bouquet of Valentine flowers.

Taylored Expressions Be Still - Feb

On each month, I used stencil brushes to add a soft glow behind the cross.  Then the crosses are cut out of woodgrain cardstock.

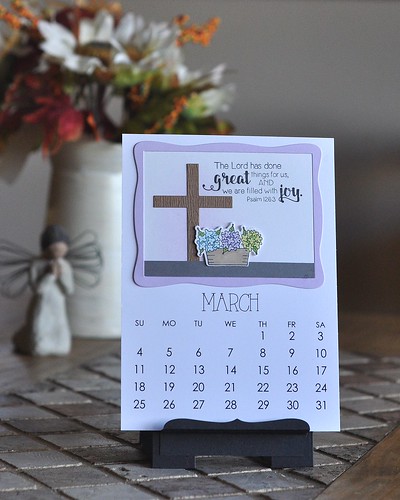
March is always a problem for me.  March happens to be the snowiest month where I live so I'm still thinking frosty thoughts. I stayed with cooler colors, but still used soft flowers.

Taylored Expressions Be Still - Mar

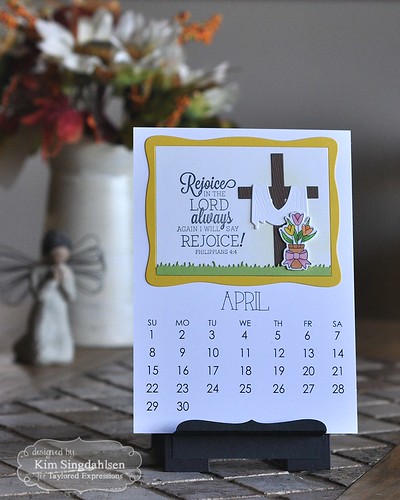
I looked up Easter before making March and April since it can fall in either month.  Did you know it falls on April Fools Day (April 1st) this year??!!  The Old Rugged Cross die set also comes with the cloth to drape over the cross for Easter.

Taylored Expressions Be Still - April

I have the rest of the months to do but you can see how well it all works together and is then displayed on the easel!

Tomorrow I'll have another idea for gift-giving using just about the funniest stamp set I have ever seen!!  Don't forget to pop over to the Taylored Expressions blog.  Taylored Expressions is celebrating Release Week with a giveaway during each day of sneak peeks! Answer Taylor’s Question of the Day for a chance to win one of the latest products before you can buy it!


SUPPLY LIST


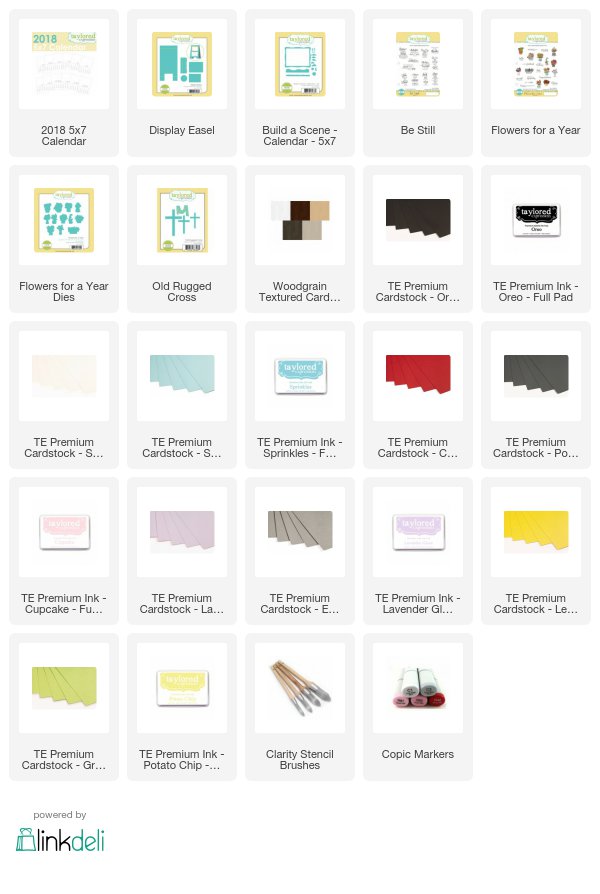
Taylored Expressions Be Still Calendar

Wednesday, October 4, 2017

TE Sneak Peek Day 3: 12 Days of Christmas Calendar

It's the third day of sneak peeks for the October release from Taylored Expressions!!  I have a fun and very easy-to-make Advent calendar for you today.  Everything you see during sneak peek week will be available on Thursday, October 5th. Be sure to check out each of the creative team members' blogs for all of the sneak peeks - starting with the Taylored Expressions blog.  While you are there make sure you check out how you can win a prize!!

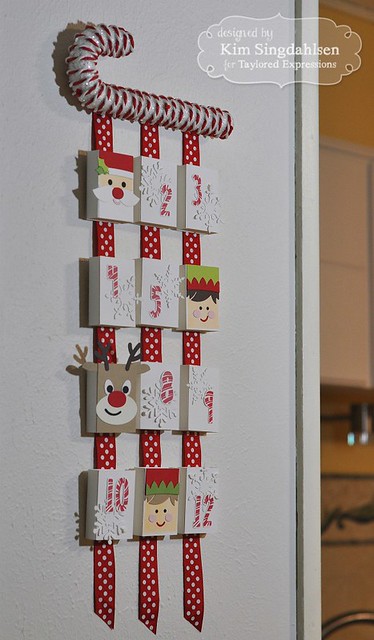
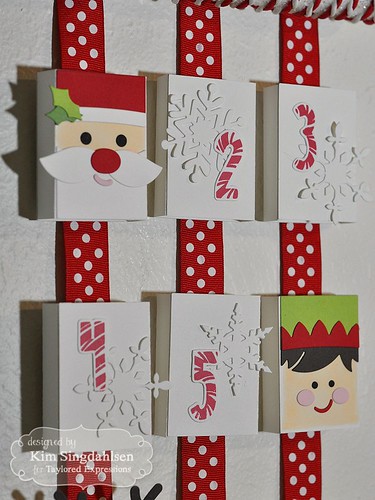
I have not been particularly good at creating 3D projects.  I can't draw a straight line, let alone cut and fold them so starting from scratch was a non-starter for me.  However, when products exist that do all of the work for you - simply cut and paste - I love doing it and I LOVE the results.  Here's my 12 Days of Christmas Advent Calendar.

TE Advent Calendar with Matchies

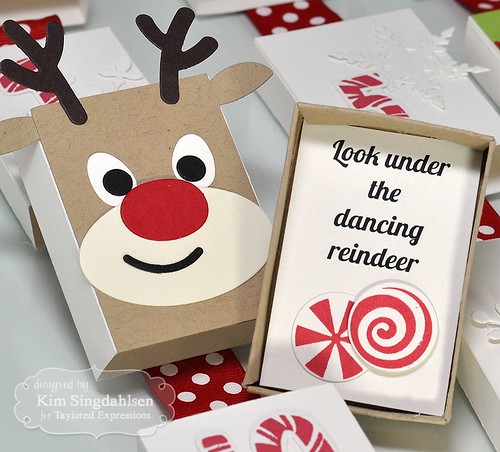
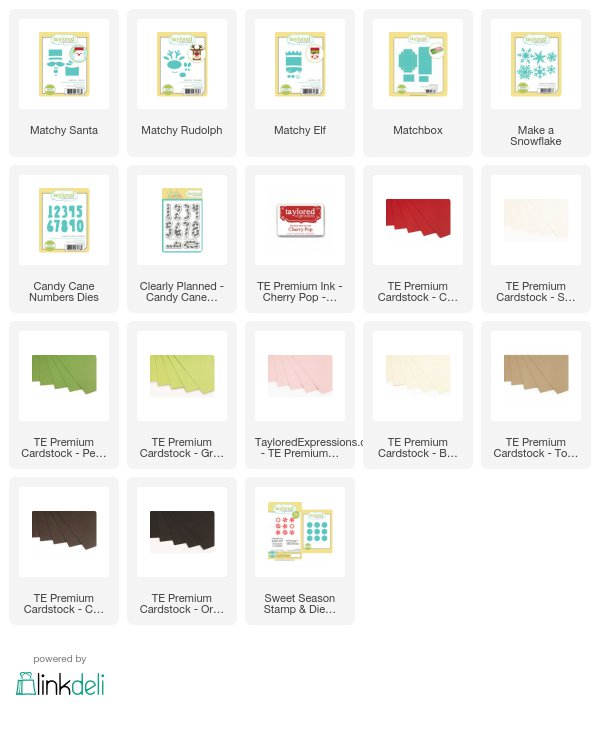
Each one of those is a Matchbox created from the previously release Matchbox die.  New this month is the Matchy series of dies.  I've used Matchy Santa, Matchy Rudolph and Matchy Elf.  They cut out pieces perfectly shaped to make the little characters on each matchbox.  (Also new is Matchy Penguin and Matchy Snowman.)  There are all absolutely charming!!

The matchbox builds with a nice, tight fit.  Even though these hang sideways, I'm not sure there's anything that small that's heavy enough to cause the inside of the matchbox to slide out. However, I chose to make it a treasure hunt and using my computer, created 1 5/8" x 2 3/8" squares to tuck in the inside.  I gave it a little color with little candies from the new Sweet Season Stamp & Die Combo.  (Our "dancing reindeer" is one of those truly annoying Christmas decorations that dance and sing when you walk by.  We've had him since the kids were little and they will not let me get rid of him even though they are now 17 and 21.)

TE Advent with Matchies

Here's a close-up of six of the calendar days.

TE Advent Calendar with Matchies

Each piece in the Matchy's comes in their die set.  I colored the top of the Matchbox with a Copic to give them some facial color.  I didn't put Matchy's on every day because I wanted those that were there to stand out.  The other days include snowflakes from the previously released Make a Snowflake and the numbers are from a new set in the the Clearly Planned series, Candy Cane Numbers and their coordinating dies.

TE Advent Calendar with Matchies

FYI - I wandered the aisles of Hobby Lobby and found a myriad of things to use as the top hanger.  The candy cane I used is a tree decoration that hangs vertically.  I just clipped off the hanger and turned it sideways. It's styrofoam so very easy to pin on the ribbon.  But they also had dozens of small plaques that you could glue ribbons on to.  I even looked through the plant picks and the bundles of sticks.  There are so many options to put this together.  Have fun!!

Tomorrow is the big day.  We all have a few more peeks - and the release is available starting at 7 a.m. PST tomorrow!  Be sure to pop over to the TE blog for more peeks and for a chance at prizes!

SUPPLY LIST


Monday, October 31, 2016

TE Sneak Peek Day 1: A Calendar with Critters

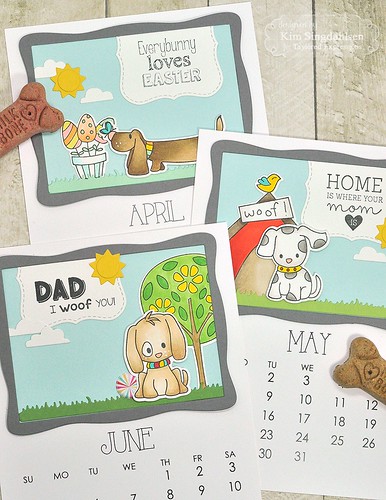
It's the first day of sneak peeks for the November release from Taylored Expressions!!  I love the November release each year because there are always calendar supplies that are perfect for making fun little gifts.  I have some calendar pages for a dog-lover to show you. Be sure to keep reading all the way to the bottom to find out how you can enter to win release week prizes.

With this release, Taylored Expressions has a new calendar size - the 2017 5x7 Calendar - which is a great size because you can use many of your regular stamps.  There is also a new set of dies that fit perfectly and frame your scenes - Build a Scene Calendar - 5x7.  I decided to use my favorite dogs from the Pawsitively Purrfect line.

TE Calendar with Critters


Before I share more picture and details on this project, I'm excited to tell you that Taylored Expressions is celebrating Release Week with some fabulous giveaways! Visit the TE Blog to answer Taylor's Question of the Day for a chance to win the prize from the latest release!


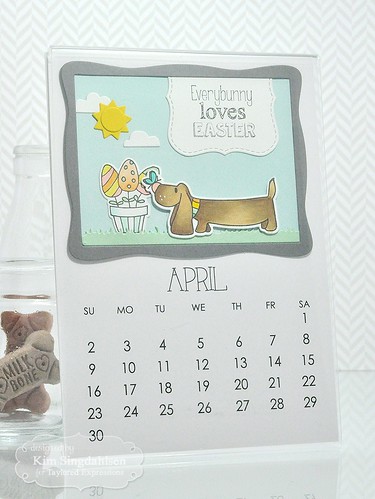
I just doesn't get much cuter than these dogs.  Here's a close look at April.  I used Marley for April. There are so many fabulous critters at Taylored Expressions.  As I was finding an Easter sentiment for Marley, I pulled out Somebunny Loves You and guess what? There's a dog in that set dressed like an Easter bunny!  I could have saved Marley for another month and used the Easter puppy.  I only have three months of calendar on this post - but it's going to be very, very easy to find puppies for all twelve months!

TE Calendar with Critters

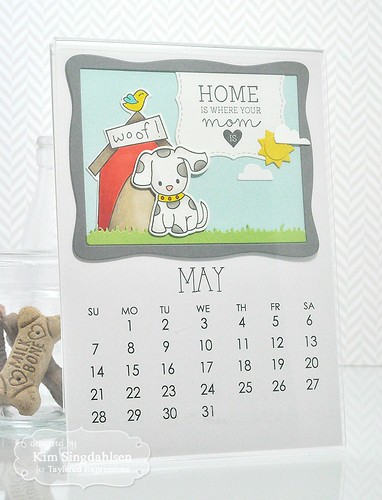
And for May, I've used Tanner.  I picked him specifically because he comes with a doghouse and I wanted to use this sentiment from Mama & Me.  (Can you tell I had a great time putting this project together? ) The new Build a Scene Calendar - 5x7 set of dies makes it easy.  On my calendar pages, you can see the frame, the grass, the sun and the clouds.  As I continue working on this set (because I do have dog-lovers in my life who need Christmas presents!) - I'll use the other ground die as sand, and the moon and stars are perfect for Halloween.

TE Calendar with Critters

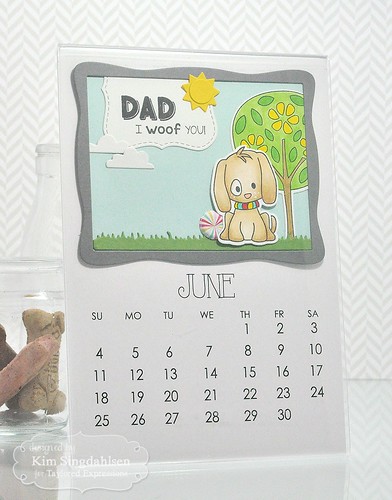
June is Watson.  Watson has to be one of my favorites and he comes with the best sentiments.  He actually is a get-well puppy with sentiments like "Sit. Stay. Heal. Get Better".  (FYI - the sentiments comes from two sets - the "Dad" is from Best in the World and "I woof you" is from Tanner's set above.)

TE Calendar with Critters

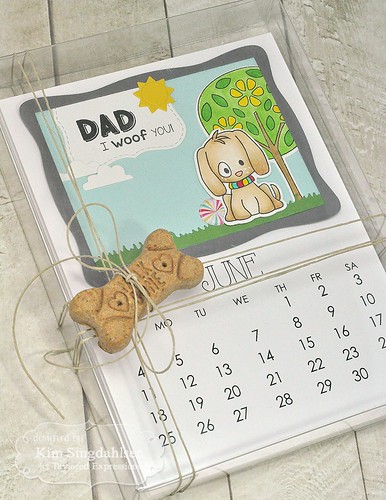
There are other new accessories in the TE store to package everything up.  You can see the 5x7 Acrylic Frame in the individual photos above.  It's very easy to change months with this frame. Then I packaged them all up into the 5x7 Clear Calendar Boxes which come in a set of five.

TE Calendar with Critters

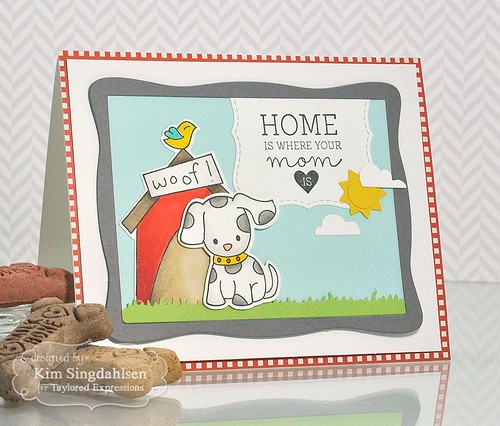
Now I'm going to sidetrack briefly.  I hated the idea of making this calendar and having all of those charming little dogs in their scenes just thrown away.  One option is to use temporary or repositionable adhesive behind each framed scene, then they can be pulled off when the month is over and re-purposed!  I would guess any dog lover that gets this calendar would be happy to keep the scenes to be re-used.  Or you can cut the tops off the calendar pages to make cards - you could give your dog-obsessed recipient a full set of cards for the next year!  Check it out!

TE Calendar with Critters

The calendar pages are just a little narrower than an average card.  Just make a card base with a front that is 4 1/4" by 5 1/4", add a bit of background paper, plop on the re-purposed dog panel and you have a card!


Hmmm...you know what else would be fun?  A Grumplings calendar!!!  I love the Taylored Expressions grumplings. Scenes using them would make me smile each day as I looked at the calendar!  I think I have Christmas for my friends all figured out!


SUPPLY LIST