Friday, November 30, 2018

Taylored Expressions Buffalo Plaid Flap Tags

Hand-crafted tags are a fabulous way to dress up a gift.  I have a fairly large stash of simple kraft-colored bags that get decorated with a big bow and a fun/beautiful/rustic tag.  I've found that the tags often get more attention than the gift!

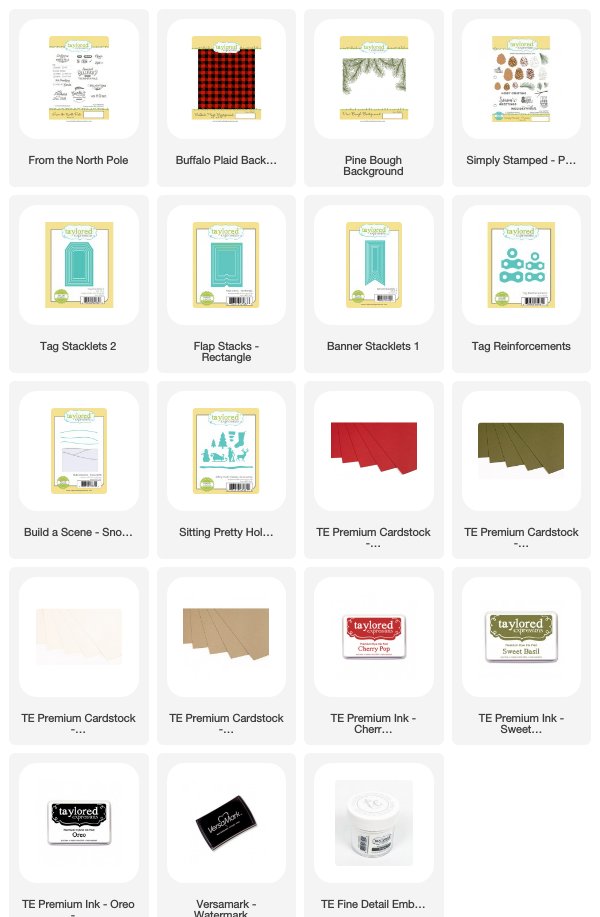
So I'm thrilled with the variety of products by Taylored Expressions that can be used for my tags.  I fell in love with the recently released Buffalo Plaid Background stamp.  And I've always loved the Flap Stacks dies that add a surprise opening to the tag.  With those items as my starting point, I created two rustic tags.

Taylored Expressions Buffalo Plaid Tags 

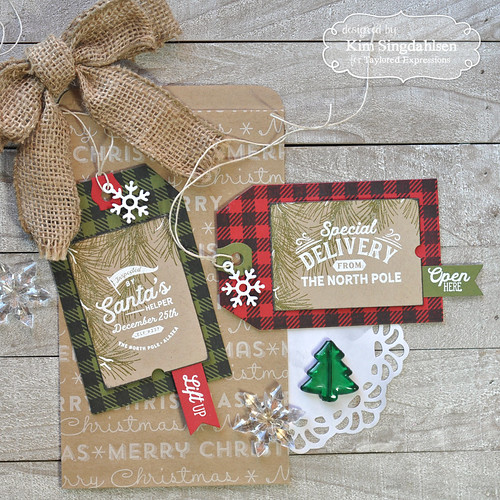
The outside sentiment is from From the North Pole.  I kept it rustic using just a corner of the Pine Bough Background behind the sentiment.  (The opening is cut with Flap Stacks - Rectangle.  It cuts a flap right into the tag, but I wanted to use Toffee for the sentiment, so I cut another "flap" from a scrap piece of toffee and then cut it off on the flap side.  Then after stamping on it, I adhered it to the flap cut into the tag.)

There's a surprise on the inside that I didn't want anyone to miss - so I added little banners with sentiments from the From the North Pole set.  I fit them in between the toffee layer and the flap cut on the tag.

Taylored Expressions Buffalo Plaid Tags

Taylored Expressions Buffalo Plaid Tags

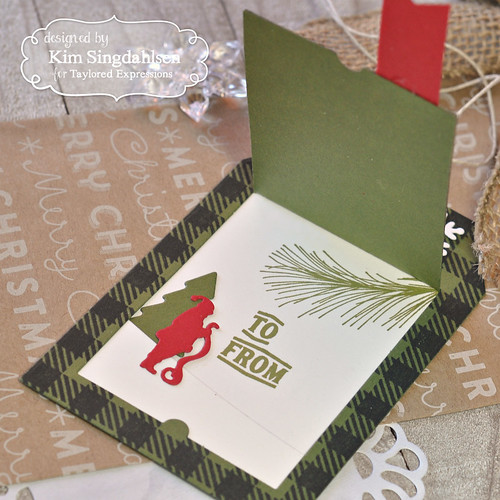
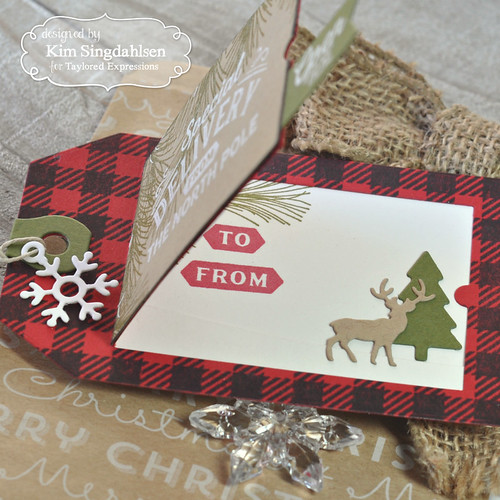
My insides use "to/froms" also from From the North Pole.  The little dies come from Sitting Pretty Holiday Accessories - which are meant as part of the Sitting Pretty series of items that can sit on a die-cut shelf - but also work just perfectly for little scenes.

FYI - I used the Pine Bough Background on the outside, but I just wanted a single Pine Bough on the inside so I used one from Simply Stamped - Pinecones.  It would have worked just fine to stamp that single bough multiple times on the outside - it just seemed easier to use a background stamp that was already "arranged"!

Taylored Expressions Buffalo Plaid Tags

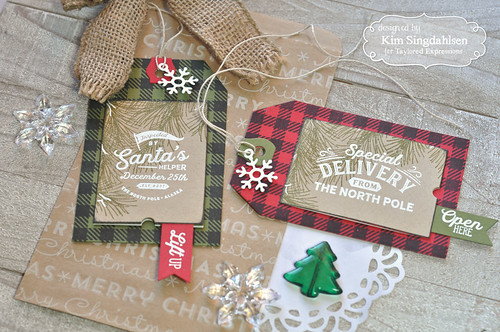
I totally love this look.  I am thrilled with the Buffalo Plaid and the beautiful pines and the fun little dies to use for my Christmas scenes.  I can't tell you these were easy, but they are being used for some very special boys/men in my life so I wanted them to be extra special.  
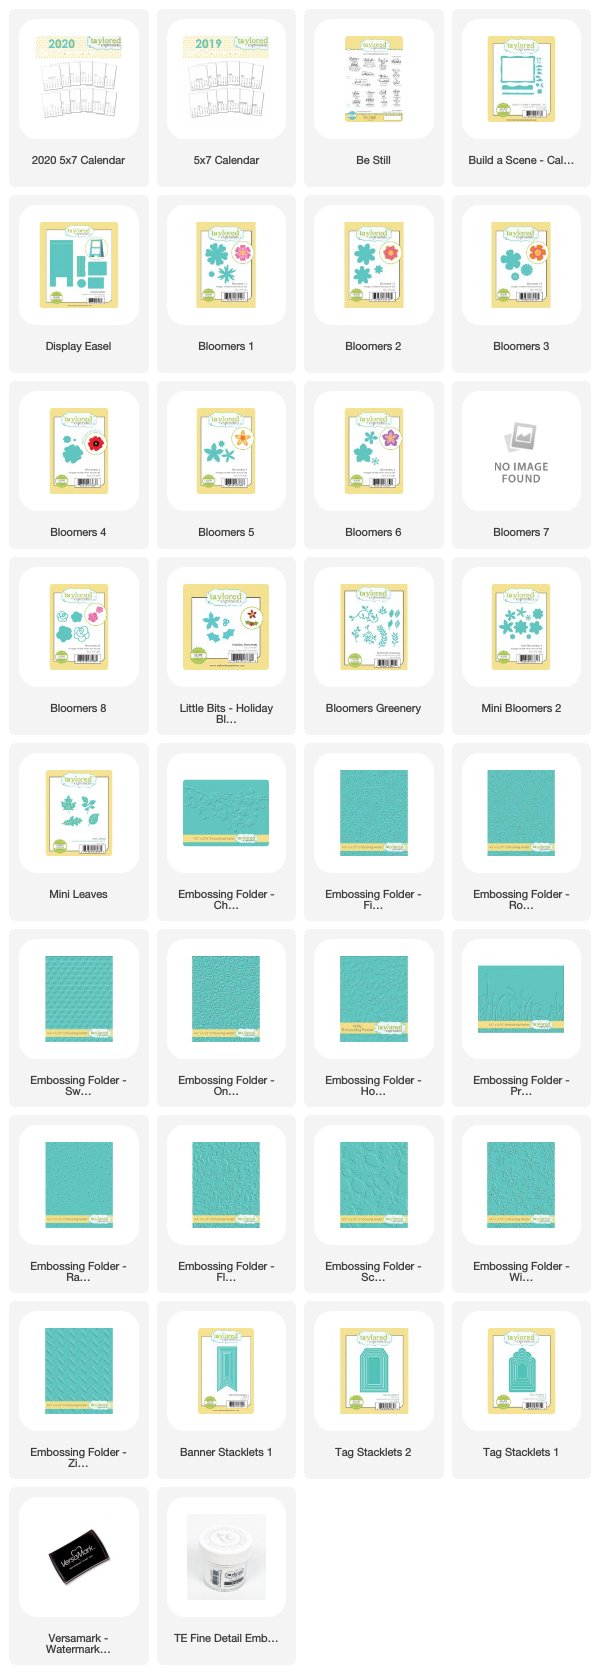
SUPPLY LIST


Wednesday, November 28, 2018

Freshly Made Sketches: Merry Flowers

It's time for a new sketch at Freshly Made Sketches! Today we have a sketch by Jen Brum.


For reasons I can't explain, this simple sketch gave me problems.  I had initially decided that it was perfect to showcase a fabulous patterned paper in the background and a fun sentiment on top - but then realized that I hadn't purchased Christmas patterned paper in so long that my stash was looking dated.  PLUS - then I needed a vertical type sentiment, also nothing fresh and new in my stash. 

After a few more false starts, I saw this poinsettia in my not-yet-used stash.  First I tried stamping it on to a rectangle with some of it going off both sides, but I lost too much of its beautiful flowers and foliage.  Then the light bulb went on - the flower itself is vaguely rectangular (or at least I convinced myself of that because I liked where this attempt was going!)  The only stumbling block was the vertical sentiment - I had to go quite a ways back in my stash for this one - but it works!!  (I cannot believe how hard I make it all sometimes!)

FMS Poinsettia

I hope to see you playing along with us this week.  Take a lesson from me and don't make this too hard because it really is a sweet sketch and will definitely work well to quickly add to your Christmas card stash!!

SUPPLY LIST
Stamps: Avery Elle Merry Flowers, Papertrey Ink Season's Greetings
Die: Avery Elle Double Pierced Rectangles and Merry Flowers dies
Sequins: Simon Says Stamp Stay Gold
Miscellaneous: Nuvo Metallic Auburn Pearl Crystal Drops

Monday, November 26, 2018

Taylored Expressions: 2019 Calendars

I have so many friends and family on my Christmas list for whom we don't really buy gifts - but I definitely want them to know that they are on my mind.  A hand-crafted gift is the perfect way to say I love them!  Sometimes, I'll box up a variety of my cards for their use.  For others, a calendar is just the right way to go because every day they will know that my thoughts are with them.

Taylored Expressions has the perfect line of products to create calendars.  Recently, they have done a series of posts showing each type of calendar: a desk calendar (with a wonderful new set of border dies), a mini-tear offa 3x4 calendar, then they used my calendar (which I'll detail more below) to show their 5x7 calendar.

Here's an example of the 5x7 calendar:

Taylored Expressions 5x7 Calendar

I especially like this size because they can easily be re-purposed.  I give the recipient instructions to cut off the top - then I give them some pre-folded cards for them to glue that top to and they have a greeting card! (Don't forget envelopes!)  It's not perfectly sized so you have to play around with it a little bit.  When you cut off the top, it's around 3 1/2" by 5" which isn't a standard card front so you'll have to experiment a bit.  Last year, I put a coordinating 1" strip of patterned paper across the bottom of my pre-folded card fronts to balance out the odd size. 

To do 12 months of calendars, you have to have a plan of attack - remember that you have 12 little works of art to make for each recipient! (Another option is to send each month's calendar throughout the year - that's definitely a thoughtful gesture.)

This year I decided to use embossing folders to easily add impact. (For years, I ran a church card making ministry.  We could have 40 ladies in an evening - usually 30 of whom had never made a card.  I found it surprising, but the "technique" that they found almost miraculous were dry embossing folders.  I think as a long-time crafter, I knew embossing folders were easy so it seemed like nothing to marvel at.  But this group always got wide-eyed at the results.  So how perfect for this calendar project!)

Then I decided to use the Be Still stamp set.  It was specifically created with 12 months of verses!  Finally, for a pop of color, I added a flower from the Bloomers collection.

I laid out each of the 12 months on my desk - decided on an embossing folder, a verse, a flower and colors. From there, I could do an assembly line!

Here's what I came up with for each month - scroll on through because I have some other tips and hints at the bottom.

Taylored Expressions 5x7 Calendar

A few suggestions to get this done easily (and a few things I learned along the way)
  • I used a variety of banners, tags and cardstock strips to add variety. It would be faster just to use strips of cardstock to avoid die-cutting, in other words, do them all like September and October. It still looks fabulous! 
  • If you do cut tags, stamp and heat emboss the sentiment first, then cut them - it's much easier to line up a die (because you can see through it) - than using a tool to get the sentiment stamped straight on a pre-cut tag.
  • The next time I do this, I probably won't heat-emboss the sentiments.  I love the look, but it's seriously time-consuming.  I'd do the sentiment strips in basic Sugar Cube, then I'd stamp them in a coordinating color to the frame.  That would definitely speed up the assembly line.
  • For the assembly line - I cut the frames from Build a Scene - Calendar - 5x7, then I cut the inside of the frame with Sugar Cube to give me the panel to emboss.  It would have been much easier to just use my paper cutter to cut the insides instead of running the die through 12 times.  The inside is 3x4.  Another option is to cut the insides a scant 3 1/4" by 4 1/4" so that the frame sits on top and gives some dimension.
  • Of course, I did this for where I live.  You could switch up seasons, or Thanksgiving, or skip the 4th of July.
  • There are so many wonderful basic embossing folders....  you do not have to have a seasonal folder with so many alternatives.
I used the Display Easel dies for a stand.  With all of the layers of the cardstock, it's a bit heavy for the easel.  I solved that in two ways.  First, there's a die for the lip to hold the calendar.  Cut two of those, flip one upside down and use it under the regular lip as extra support.  If you look just below the "27" on the next picture, you can see just a hint of the cardstock support piece.  I also cut two cardstock pieces, approximately 1" x 3" and adhered them from front to back to hold the legs and keep them from sliding apart.  (This piece of advice makes more sense if you see the die!)  FYI - a clear desktop acrylic frame would make the display of these much easier but be careful of dimension if you use this idea.

Taylored Expressions 5x7 Calendar

Are you feeling overwhelmed?  It's really not as complex as it looks.  And once you get it all planned out (and learn from my mistakes), these are really quick and easy but give amazing impact!  My supply list is below - but if you want the excruciating details, I have the items for each calendar listed below it.

SUPPLY LIST:


BY MONTH:

General:
2019 5x7 Calendar
Be Still stamps
Frame from Build a Scene - Calendar - 5x7
Sugar Cube Cardstock
Fine Detail White Embossing Powder with Versamark

January:
Sea Salt Frame
Banner Stacklets 1in Earl Grey
Winter Flurry Embossing Folder
Bloomers 6 in Confetti Cake, Salt Water Taffy and Silver Metallic

February:
Lollipop Frame
Tag Stacklets 2 in Oreo
Swiss Hearts Embossing Folder
Bloomers 2 in Strawberry Milkshake, Lollipop, Lemon Meringue
Strawberry Milkshake Enamel Shapes Hearts

March:
Peapod Frame
Banner Stacklets 1 in Toffee
Floral Vine Embossing folder
Bloomers 1 and Bloomers Greenery in Pineapple, Sugar Cube, Chocolate Truffle and Peapod

April:
Granny Smith Frame
Toffee behind sentiment
Cherry Blossoms Embossing Folder
Base flower from Bloomers 1 and the center from Bloomers 5 using Pink Champagne and Shimmer White (trying to look like a Cherry Blossom!)
Harvest Sequins

May:
Jelly Donut Frame
Tag Stacklets 2 in Poppy Seed
Raindrops Embossing Folder (I know that April showers bring May flowers - but Easter is in April so I pushed the Raindrops to May.)
Mini Bloomers 2 and Bloomers Greenery in Salt Water Taffy and Granny Smith

June:
Lime Zest Frame
Tag Stacklets 1 in Earl Grey (trimmed to be shorter)
Rosy Posy Embossing Folder
Bloomers 8 in Guava and Pink Champagne, Bloomers Greenery in Lime Zest

July:
Blueberry Frame
Banner Stacklets 1 in Poppy Seed
Fireworks Embossing Folder
Bloomers 5 and Mini Bloomers 2 in Watermelon and Blueberry
Build a Scene Halloween sequins

August:
Blue Raspberry Frame
Oreo behind sentiment
On the Spot Embossing Folder
Bloomers 7 and Bloomers Greenery in Lemon Meringue, Potato Chip, Cookie Monster, Blue Raspberry and Playful Patterns - Black & White
Hello Sunshine sequins

September:
Sweet Basil Frame
Toffee behind sentiment
Scattered Leaves Embossing Folder 
Mini Leaves in Dijon, Pumpkin and Sweet Basil (The plan was a year of flowers - but how could I not do leaves for September??)

October:
Plum Punch Frame
Oreo behind sentiment
Zig Zag Embossing Folder
Bloomers 3 in Candy Corn, Lemon Meringue and Oreo
Plum sequin from Build a Scene Halloween, orange sequin from Harvest, yellow sequin from Rainbow Brights

November:
Chocolate Truffle Frame
Banner Stacklets 1 in Toffee
Prairie Embossing Folder
Bloomers 4 and Bloomers Greenery in Sweet Potato Pie, Chocolate Truffle, Lemon Meringue and Toffee
Snow Flurries sequins

December:
Cilantro Frame
Tag Stacklets 1 in Toffee (trimmed to be shorter)
Holly Embossing Folder
Little Bits - Holiday Bloomers in Red Pepper and Cilantro
Lemon Meringue and Cherry Pop Enamel Shapes

Wednesday, November 21, 2018

Freshly Made Sketches: Believe

It's time for a new sketch at Freshly Made Sketches! Today we have a sketch by me!


I put this sketch together with the idea of a layered snowflake die that I recently purchased.  But when it came time to create the card, I struggled.  So I switched gears to a squirrel with a latte.  Still struggled.  I hate when that happens.  It just shouldn't be as hard as a make it sometimes - it's a hobby, right?  A relaxing, enjoyable hobby.   I have learned to stop the struggle early.  If I find myself looking askance at a partially crafted card, I allow myself to try maybe two things - a new paper, new colors, etc. - then I move on.  I know it's mental, but once I decide I'm not happy - I'm never going to be happy. 

But this card finally made me happy!  Who wouldn't like a big red "believe" ornament?! 

FMS Believe

I'm figuring out my photo options right now because the wonderful natural light in my new craft room disappeared completely with the shorter days and lower sun.  I think I've decided photos from the top are my best choice; however, I'm still practicing and I haven't quite figured out how to show dimension.  So here's a shot from the side to give you a better idea on this card.

FMS Believe CloseUp

I wish I had pictures for you of my photo experimentation.  The table that I used all summer is window height.  When I started practicing with photos from the top, without any logic at all, I kept the cards on that table and literally climbed a stepladder each time to get above the card to take the photo.  It took seeing a friend's picture of her card on the floor (in her case, with a cat blocking the photo), before I realized what an idiot I was being!

I hope to see you playing along this week.

SUPPLY LIST
Stamps: Reverse Confetti Vintage Ornaments
Dies: Reverse Confetti Vintage Ornaments, Cottage Cutz Spruce Stems
Cardstock: Stampin' Up Gray Granite, Taylored Expressions Peapod and Granny Smith
Patterned Paper: Reverse Confetti (from a retired paper pad)
Ink: My Favorite Things Wild Cherry, Stampin' Up Gray Granite
Miscellaneous: Stampin' Up Subtle Embossing Folder, Pretty Pink Posh Sparkling Clear Snowflake Sequins

Friday, November 16, 2018

Taylored Expressions: A Trio of Cakes

I have a dear friend's birthday coming up so I dug into my not-yet-used stash and came up with this amazing Build a Cake dies. These dies can create basic cakes, tall cakes, heavily decorated cakes, elegant cakes, fun cakes, etc.

I found a friendship sentiment and I built a lovely cake.

KIM Build a Cake 1

I love this cake.  Only the oval mat at the bottom is from a separate die set.

KIM Build a Cake 1 Close

As much as I love that cake, I took a hard look at it and realized that I had built it for myself.  I went with traditional colors - like vanilla, chocolate and strawberry.  I am a very matchy-matchy person.  My friend is bold and bright.  She puts clothes together that, on me, would make me look like a clown - but she looks trendy and fabulous.  Nothing in her house matches, but it is warm, comfortable and inviting.  I wish I could be more like her!

So I took another stab at a cake pulling out my favorite color combo taken from the Hello Sunshine paper pack.

KIM Build a Cake 2

This one is much closer to her personality (Although my eyes are struggling with all of the patterns and colors!!  I know.  There are really only two patterns (the dots are in three colors) and the patterns are only stripes and dots - so this really isn't actually over the top at all, right?!)  Keeping it all on a white background and adding a simpler sentiment kept it within my cleaner wheelhouse even though it's much bolder and brighter.

But it still wasn't right.  Her personality tends toward the sarcastic...seriously sarcastic - so I really needed to move away from a simple "celebrate".  Here's my final card - and it is truly perfect for her. 

KIM Build a Cake 3

It doesn't have nearly the decorations on the cake - but the wonky layers and fun bow (from another die set, see below) kept it bold and the snarky sentiment is just right!!

KIM Build a Cake 3 Close

This works!!  And I had a great time working on all three of them!!  (Just don't tell any of my other friends or coworkers when they get a card that I actually created for someone else!)

SUPPLY LISTs

Chocolate/Vanilla/Strawberry


Bright and Bold


A Bit Sarcastic!

Wednesday, November 14, 2018

Freshly Made Sketches: Joy

It's time for a new sketch at Freshly Made Sketches! Today we have a sketch by Jennifer Timko.


I love creating little scenes so there was really no doubt what I'd being doing on this one.  I used that small box for my entire scene!

FMS Joy

I sponged on three Distress Oxides - Mustard Seed, Tumbled Glass and Broken China.  Then I spritzed it with a glimmer mist and let the Distress Oxides do their thing.  I built a little church with some frosty trees around it (although my short little bush was ill-conceived - it looks like seaweed!) I needed a strip of paper down the side per the sketch and I tried dozens.  I really didn't have any intent to go black and white but I like the more modern feel.  For the sentiment, I thought a simple "joy" said it all!

I hope to see you playing along with us this week at Freshly Made Sketches.

SUPPLY LIST

Sunday, November 11, 2018

AAA Card Challenge Guest: On the Move

I am honored to be the guest designer at the AAA Cards Clean and Simple Challenge for the new challenge "On the Move".

"On the Move" is such a fitting challenge for my life right now.  I have one son almost through college and one getting ready to move away and start college.  My husband and I have recently moved for the first time in 27 years. I've had long-time local friends whose lives have changed and they've moved far away.  There's been stress and sadness but there's not been a move that hasn't been a step forward.  It's all part of the journey and it's important to view that journey with joy. 

AAA GD On the Move

I love the fonts on this sentiment and I wanted an image/die that was equally charming.  This scooter jumped out as a perfect choice. (Although given it's my two sons that are currently on their journeys and might need a reminder of the "joy", I'm not sure a pink scooter made a lot of sense!!)  I brushed on a bit of blue sky, added a road and then a few sprinkles that are actually flowers but I decided they could be sun sparkles or even an asterisk.

Thanks again to AAA Cards for allowing me to be their guest and for the really fun and creative challenge!!


SUPPLY LIST

Friday, November 9, 2018

Taylored Expressions: Alpaca My Party Hat

I seem to need as many birthday cards in November and December as I do Thanksgiving and Christmas cards.  You'd think people could plan their birthdays better, wouldn't you?  (Of course, this from the mom who has kids with birthdays on December 29th and January 4th!)

This card is for a gentlemen at work who has a thing for goats and alpaca.  Turns out I don't have a single goat in my stash but I do have this fabulous alpaca and/or llama from the Taylored Expressions Llama Love set.

KIM Llama Love

This guy is charming and what makes him even cuter is there are four faces to choose from.  I had used another fun face on this card!!

Since the card was for a guy (and an accountant at that), I kept this card relatively unembellished.  I stenciled on some clouds, then used a simple pattern for the ground.  I just looped some twine for a alpaca-ish, masculine look!

Here's another look at that grinning face!  I can't help but smile back!!

KIM Llama Love Close


SUPPLY LIST

Wednesday, November 7, 2018

Freshly Made Sketches: Christmas Wreath

It's time for a new sketch at Freshly Made Sketches! Today we have a sketch by Linda.


I'd love to be creative with this one - but how could I not do a wreath at this time of the year??!!  I have this new to my stash wreath die from Memory Box and sentiment from Right at Home.  I love this sentiment set - it's new to my stash and it will definitely be my go-to this year.

FMS Wreath

I think the little berries make this card!!  They are Little Things from Lucy's Cards Glossy Berry Mix Pearls.  They have a fabulous golden sheen!

I wanted a simple background but unique - so I used Taylored Expressions Brick by Brick Stencil but I taped off a number of them to give it this random look.  Once I had the stencil all taped up, I did a number of these backgrounds so you'll be seeing more of them.

I hope to see you playing along this week at Freshly Made Sketches.

SUPPLY LIST
Stamps: Right at Home Peace Love Joy
Dies: Memory Box Pine Wreath, Taylored Expressions Door to Door Summer Decor (the bow) and Stitched Rectangle Stacklets
Cardstock: Taylored Expressions Peapod and Granny Smith
Miscellaneous: Taylored Expressions Brick by Brick Stencil, Dreamweaver Embossing Paste, Little Things from Lucy's Cards Glossy Berry Mix Pearls, Versamark, Taylored Expressions Fine Detail Gold Embossing Powder

Thursday, November 1, 2018

CAS(E) this Sketch!: Give Thanks

I am absolutely thrilled to be the guest designer for this week's sketch at CAS(E) this Sketch!  It's extra exciting because it's like coming home - I was actually on the design team starting with sketch #1 (first card here)!!  Sixty-six sketches later, I had to step away (final card here).  Life got in the way (isn't it sad when that happens?!) and I was busy finishing a second college degree and finding employment.  Since then both of my sons have graduated high school and then we moved after 27 years in the same house.  So it feels like a life-time ago that I was part of this team and it's fabulous to be back for a guest spot.

Here's this week's sketch.


Their sketches are so amazingly creative.  They are clean and simple - yet always have a unique look.  They can be challenging, but I'm always thrilled with my card when I make it work.   (I was asked to be a guest based on this card for Sketch 286 which also happens to be one of my all-time favorite cards!)

I am still in need of Thanksgiving cards so I decided long, thin autumn leaves would work well.  I then found this stamp with a trio of leaves and knew they would add interest if a did a trio of each color, then just some minimal shading.  It's one of my favorite fall sets - Reap a Harvest by Lil' Inker Designs and

CtS Nov1 GD Give Thanks

This is one of my favorite fall sets - Reap a Harvest by Lil' Inker Designs.  How many of you buy a stamp set and use it once?  Or even never use it??  That would be me!!  Then there's a few sets that stick in your mind.  When I need a simple leaf or berries or an acorn, this is one that occurs to me.  I may not use it every time, but it's an option that I remember. And with the size of my stash - that's saying a lot!!

Thanks to Chrissy and the entire group for letting me join in today!

SUPPLY LIST
Stamps: Lil' Inker Designs Reap a Harvest
Dies: Taylored Expressions Stitched Banner
Sequins: Simon Says Stamp Stay Gold