Showing posts with label stencilcard. Show all posts

Wednesday, August 6, 2025

Freshly Made Sketches: Wildflower Birthday

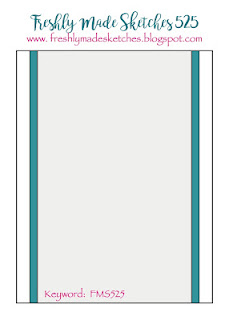
It's time for a new sketch at Freshly Made Sketches! Today we have a sketch by me and here’s what I did with it!
 
Wildflower Birthday


I rather selfishly put this sketch together to force me to use one of my Waffle Flower Postage stencils. I really do love all of their postage stencils but I'm just not an inky gal; I'm all about the die-cutting. But I got one last year and actually enjoyed inking it so I got more. I like them probably because there are lots of small inky sections vs. trying to do an entire background. So for this card, I pulled out the Wild Flowers and made a birthday card. Of course, after I got the whole thing inked, I realized I also have the Cupcake postage stencil so coulda/shoulda gone that direction. But I do like the colors on these wildflowers so I'm happy with the results.

If you started with my blog, be sure you check out the cards from the rest of the design team because while I imagined postage, their creative minds saw leaves and even luggage!  I hope to you playing along with us this week at Freshly Made Sketches.

SUPPLY LIST
Stamps: Waffle Flower Elegant Sentiments and dies, Postage Collage Fall, Postage Collage Birthday
Dies: Waffle Flower Postage Collage die, Birch Press Design Pinpoint Contour Plate
Cardstock: Stampin' Up Granny Apple Green
Other: Waffle Flower Wild Flower Stencil

Friday, November 15, 2024

Autumn Greetings

I have one more new-to-me stencil to try and I want to live in fall for just a bit longer (even though we got 30" of snow last week!)

Autumn Greetings

If you've followed my blog the last few weeks with my attempts at stenciling, you will be surprised when I say I thoroughly enjoyed working on this card! I was in such a good "mental" place that when I got the stenciling done, I actually was comfortable stamping the postage stamps onto it.  That's a big deal because I find stenciling so stressful worrying about making a mistake after multiple layers. I always froze and could not handle the risk of adding a stamp to it.  It might smear or it might only partially stamps.  I know I could get out the stamp positioner, but I took the risk without it!

I decided my enjoyment might be because all the spaces are small. When I do big spaces, I typically get some sort of darker spot in the shape of a brush.  I understand that's part of the unique beauty of brushing on color but I prefer having control!  (It's the same reason that I don't love watercoloring.)  The small spaces on these postage collage stencils are easy to use and might be the turning point for me on using stencils.

BTW - this is Waffle Flower's older fall stencil; they have a newer one for this year named Harvest. I do love fall colors and I'm thinking it might need to come into my stash so I can mix and match the little scenes from the two sets.

SUPPLY LIST
Stamps: Waffle Flower Postage Collage for Fall Stamp Set
Dies: Waffle Flower Postage Collage die, The Greetery Let's Have a Word Autumn
Other: Stampin' Up Subtles embossing folder

Sunday, October 27, 2024

Waffle Flower Postage Collage Snowman

Last week I posted a card with a stenciled leaf wreath but said I was thinking of destashing my stencils because I don't use them. It seems that, while many of you love using stencils, you've given me "permission" to destash!! The general view being that there are just too many great crafty products out there so why use something that I don't enjoy. I had totally decided to do that and what shows up in my mailbox? New stencil sets. (I think I have a problem!) 

Merry Snowmen

I absolutely love the series of postage collage stencils, dies, stamps, etc from Waffle Flower so I had to try them before cutting stencils out of my crafting life.

If any of you have this stencil set, you might be looking at my card like there's something wrong.  There is.  I got it all finished and pulled out the postage stamp die, tried to line it up, and cursed multiple times...loudly. My family came running - I don't typically curse, let alone at the top of my lungs.  But guess what?  I had done the whole thing backwards so it didn't line up with the die.  It was a horrible moment.  Obviously I got the job done - I die cut from the backside so the edges aren't crisp and clean. But I was not wasting my entire inky morning!

It hasn't changed my decision on stencils - in fact the panicked moment at the end just solidified my move away from stencils. It's really a shame and a loss on my part, because these postal collage stencils are amazing!  (And yes, I ordered two different sets so I have one more to play with!)  And then I'll destash!

SUPPLY LIST

Stamps: Waffle Flower Elegant Christmas Sentiments (and dies)

Dies: Waffle Flower Postage Collage Die

Ink: Stampin' Up Balmy Blue, Pecan Pie, Mango Melody, Flirty Flamingo, Daffodil Delight, Coastal Cabana, Fresh Freesia and Lemon Lime Twist

Other: Waffle Flower Postage Collage Snowman stencil, Frost Shimmer Spray

Tuesday, October 22, 2024

Harvest Blessings

 I am very late to the world of stencils. Actually that's not quite true. I bought dozens and dozens of them when they first started coming out and then I stenciled once or twice but just didn't enjoy it. I think it's a little bit like cooking dinner - I say I don't enjoy cooking but what I really dislike is cleaning up.  Ditto with stencils. I get ink everywhere and then there are the brushes to clean and don't get me started on how much the permanent stains made by red ink stress me out.

But the newer generations of stencils are absolutely amazing and they create works of art.  I feel like I'm missing all the fun of stencils. I went through my current stash of stencils - most of which are the simple background stencils that came out with the first generation of stencils- but I found this two layer Leaves Wreath by Simon Says and thought I'd give it a try.  

Harvest Blessings

You can see I'm very simplistic although I'm quite proud that there are actually 7 colors on this card all blended together - two oranges, two yellows, two greens and the brown. I definitely groaned heavily when it was time to clean up so I'm fairly sure that stencils still won't be my thing but I like the results and I just might be able to justify bringing a few of the newer amazing artistic stencils into my stash.

The sentiment was done on a banner simply because I refused to stamp directly on my stenciled background with the potential to mess it up!

(Hey Carol - this is the second card this week and I already have #3 ready to go! You are a good motivator!!)

SUPPLY LIST

Stamps: Right at Home Be Thankful

Stencil: Simon Says Stamp Leaves Wreath

Ink: Stampin' Up Pumpkin Pie, Peach Pie, Pecan Pie (hungry yet?!), Crushed Curry, Daffodil Delight, Granny Apple Green, Lemon Lime Twist

Other: Stampin' Up Subtle embossing folder, Pinkfresh Gold Glitter Drops

Wednesday, March 2, 2022

Freshly Made Sketches: Alleluia

It's time for a new sketch at Freshly Made Sketches! Today we have a sketch by Karren and here’s what I did with it!
 
Alleluia Meadow


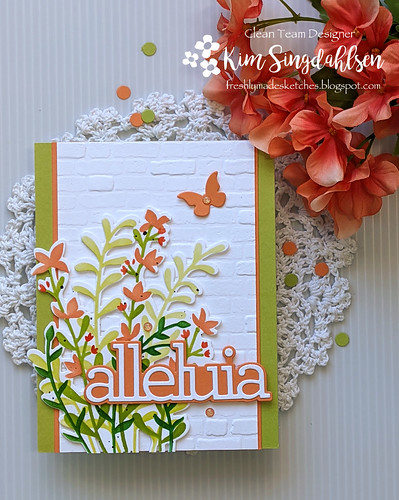
With all of that wonderful open space, I wanted something dramatic.  I have a number of wonderful flower builder stencils and decided to add a full meadow of flowers. This is Pinkfresh's Enchanting Meadow. 

After I got the colors layered up, I didn't love my choice of dark greens. I didn't want to start over so that led me to the sentiment. I had planned on a sentiment strip so as not to hide any of the flowers - but I ended up with the bigger "alleluia" so the green I don't like just peeks out. I think it ended up working beautifully especially with my need for Easter cards.

Alleluia Meadow

I hope to see you playing along with us this week at Freshly Made Sketches.  I'm looking forward to seeing what everybody does with the open space!

SUPPLY LIST
Dies: Simon Says Stamp Alleluia
Stencil: Pinkfresh Enchanting Meadows and die
Other: Stampin' Up Brick & Mortar embossing folder

Wednesday, March 31, 2021

Freshly Made Sketches: Alleluia

It's time for a new sketch at Freshly Made Sketches! Today we have a sketch by me and here’s what I did with it!

03.31.21 FMS


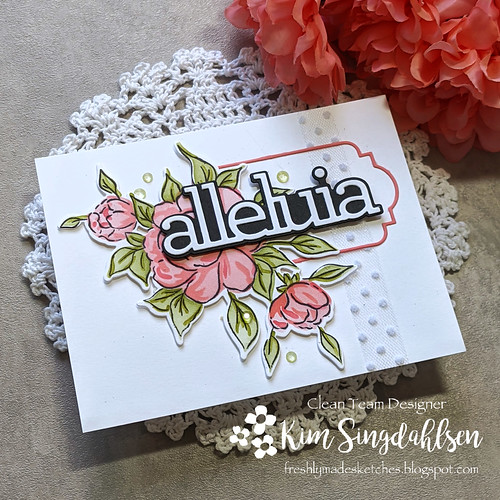
I have to admit - the idea for the card was in my head when I drew the sketch! Not all of the details, but the idea of a larger flower wrapping around a sentiment panel.  I have a number of these gorgeous stamp/stencil combinations and I am in love with them.  It's such an easy and forgiving way to add color.  You don't get multiple layers in and have a stamp mess things up (or user error) and leave patches unstamped.  You can just keep brushing color until you are happy.  

I needed one more Easter card so I went with a fresh pink color scheme.  Then I decided the bold "alleluia" was just right but didn't fit entirely in the small rectangle in the sketch.  So I let the rectangle go under the flower (because then you'd never know the sentiment didn't fit!)

When I decided to use a frame instead of a solid rectangle, I was a bit stuck on my vertical stripe.  But I recently got this polka dot tulle ribbon and decided it would be a nice accent through the frame without being distracting.

03.31.21 FMS Side

I am so excited to see what you create with this sketch.  The design team's and our player's creativity never ceases to amaze me.  I am in awe of all of the unique and absolutely amazing creations.  Have fun!

SUPPLY LIST
Stamps: Pinkfresh Choose Hope - including the die and the Layering Stencil
Dies: Simon Says Stamp Frames, Alleluia Word & Shadow
Cardstock: Taylored Expressions Guava
Ink: In layering order - Taylored Expressions Pink Champagne, Stampin' Up Flirty Flamingo, Taylored Expressions Guava. Stampin' Up Pear Pizzaza, Old Olive
Other: Studio Katia Peridot Crystals, Stampin' Up Polka Dot Tulle Ribbon

Sunday, March 21, 2021

CAS Colours & Sketches: He is Risen

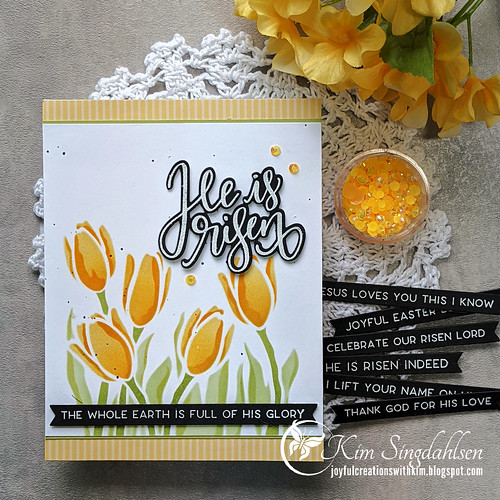
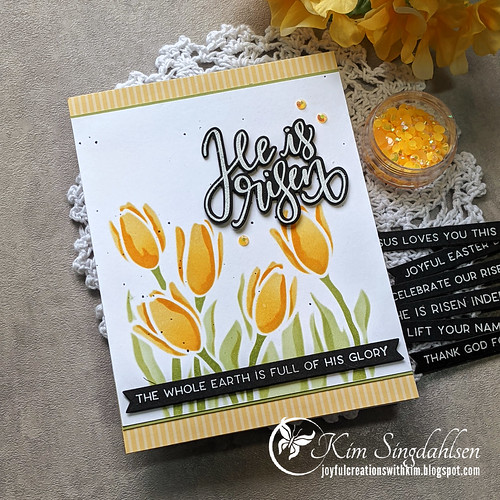
 The colors at CAS Colours & Sketches inspired me to give another new-to-stencil set a try - the Simon Says Stamp Layered Tulips.  I don't know why it took me so long to jump on the stencil trend, but as soon as they started coming up with fabulous layered stencils, I'm totally on board! It is such an easy way to add color - and to add it with shadows and dimension.

03.21.21 CAS Colours

The first stencil is Saffron with a bit of Mango sponged at the base of each flower, then I stenciled the detail layer in Mango.  All of the bottom layers are Pear Pizzazz but I did a light layer of ink, a medium layer and the darkest layer on the stems.

I hadn't thought ahead past the flowers so I checked my stash and found some new sentiments from Taylored Expressions.  The big sentiment is Handlettered Easter which isn't new - but the dies are!!  I adore the look of cut out sentiments.  The strips are a new addition to the fabulous Simple Strips line - it's Easter Blessings.  The picture shows just a handful of the various sentiments that you can cut out all at once!

03.21.21 CAS Colours side

Thank you to CAS Colours and Sketches for the inspiration!

SUPPLY LIST

Stamps: Taylored Expressions Handlettered Easter and Simple Strips Easter Blessings

Dies: Taylored Expressions Handlettered Easter dies, Simple Strips die

Ink: Stampin' Up So Saffron, Pear Pizzazz, Mango Melody

Paper: Stampin' Up Pear Pizzazz CS and the old So Saffron dsp

Stencils: Simon Says Stamp Layered Tulips

Other: Fun Stamps Journey Black Licorice Silk (for the splatters)

Saturday, March 13, 2021

The Color Throwdown: Heartfelt Sympathy

 The challenge at The Color Throwdown came at an opportune time - my husband had just asked me to make a sympathy card. It was a bit easier to make than the usual sympathy card because I did not know the person and my husband hadn't seen him decades.  But he was very important to my husband in his youth so he wanted to make sure the family knew that he remembered and he cared.

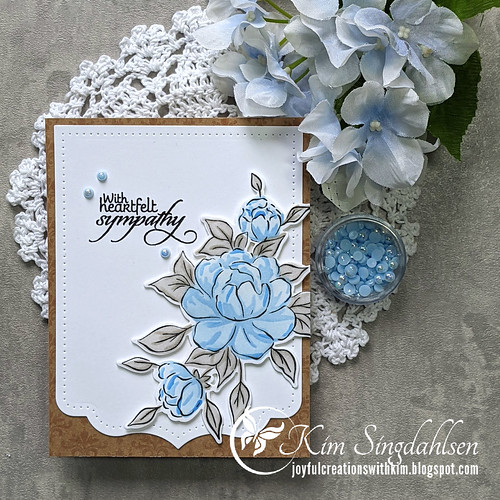
I already knew I was going to use this soft flower and then I was drawn to The Color Throwdown colors of light blue, gray and kraft for the very odd reason that it's a real struggle for me to do leaves that aren't green!  This color scheme forced me into a gray or a kraft. (I guess I could have done gray flowers and blue leaves but that's really pushing it for me!!)

03.13.21 Color Throwdown

This is another flower set that uses stencils to add the color.  With my new-found passions for stencils it definitely found a home in my stash!!  This is my most-used sympathy sentiment - it has such fabulous fonts and style - but it's from the now-closed Verve.  I found the background paper in my older stash. It's a Stampin' Up dsp that's all kraft/brown with subtle shiny patterns.  I think it was for a technique but I just wanted the elegant pattern.

03.13.21 Color Throwdown side

Thank you to The Color Throwdown for the inspiration!

SUPPLY LIST

Stamps: Pinkfresh Studio Choose Hope, Verve New Mercies (the company is no longer)

Dies: Pinkfresh Studio Choose Hope die and Ornate Banner

Cardstock: Stampin' Up

Ink: Blues from the Altenew Lapis Lazuli set, Grays are Simon Says Fog and Stone

Other: Studio Katia Bluebell Pearls

Friday, March 5, 2021

Experimenting with Stencil Adhesives

03.05.21 Stencil

I've been talking about my giant basket of supplies all of which I needed to make decisions about.  They are things other cardmakers had recommended and I immediately purchased - but do I really need them (or multiple choices of a product) since I still haven't used them.

Today, I played with repositionable stencil adhesives.  The classic is Pixie Spray but someone had recommended Krylon Easy-Tack which does have the advantage of being in the local craft stores.  

03.05.21 Stencil Spray

I used them both to add color to the four flowers.  Honestly...six of one - half dozen of the other.  The Krylon is perhaps slightly stickier - just a bit harder to peel up. I was initially worried it would peel up paper or other ink - but the stickiness didn't cause any problems. That's not to say that the less-sticky Pixie Spray was a problem.  In fact, I did three of those flowers - each requiring repositioning the stencil 13 times to get the various leaves and flowers- and the Pixie Spray stayed sticky the whole time. 

So no choice between the two but what I did learn - repositionable adhesive is totally worth it.  I can't believe I waited this long to use it. I haven't been using stencils often so I just stuck them down with a piece of repositionable tape along an edge or two but that meant the center part wouldn't be firmly down.  I think I would have been using stencils a LOT more if I had gone with the spray adhesive to start with.  Every single edge is so nicely adhered, it makes brushing on color just a dream.

I LOVE the clean results using the stencil fully adhered.

03.05.21 Stencil side

I trimmed the card down about 5/8".  It's a really tall flower so I angled it slightly and then wanted it over the edge yet sill a standard size. I initially didn't get this flower because of its unique size and shape - then I saw one of my favorite ever cardmakers do some creative things with it - check out Laurie Willison's fabulous samples!

BTW - I was also experimenting with some Altenew mini-cubes that I recently purchased.  A few weeks ago, I did a card with their Rainbow Prism set  (out of that same basket of untried products!) which I liked but lamented that I hadn't picked the right starter set and what I really needed were the some of the packs with colors in the same family to allow for easy layering. Now I have some of those and that's what I'm playing with today.  Here are two of my color combinations (details in the supply list).  I have a "celebrate" die coming from Altenew and when I get it I'll doing something with the brighter flower.

03.05.21 Stencil 2

SUPPLY LIST

Stamps: Altenew Our Friendship Blooms stamp, die and stencil combo

Die: Altenew Fancy Hello

Ink: Altenew Canyon Clay (brushed then the detail stamped), Chamomile (brushed) with Snapdragon stamped detail and a little brushed on the bud, Eastern Sky (brushed then the detail stamped), Grass Field (brushed) with Shadow Creek detail stamped, Iceberg lightly brushed in the background

Other: Altenew washi, Yellow Stickles on the flower centers

FYI - The darker flowers the Altenew Rainbow Prism set long with what I hoped would be coordinating darker colors from other sets.  I used Ruby Red with Burnt Red accents, Warm Sunshine with Snapdragon accents, Orange Cream with Marigold accents, Parrot with Grass Field Accents

Tuesday, February 23, 2021

Fab Friday: Garden Floral Stencil

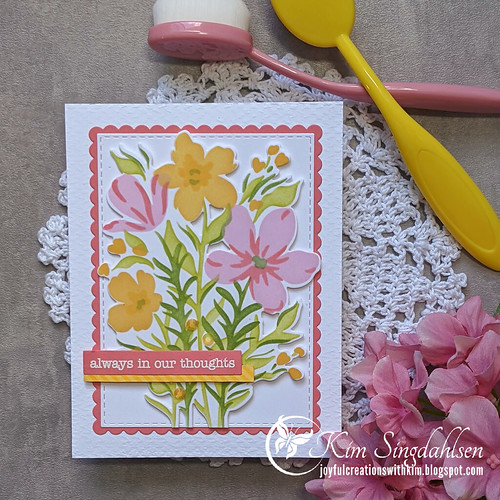
I have not used a lot of stencils.  Maybe a few as light backgrounds but not much more than that.  No reason for it, I just have so many other products, why deal with one more?!  But finally, not only did I use a stencil but I used a five layer stencil!  I might be a convert because I love the results.

2.23.21 Fab Friday

I didn't spend any time thinking about this one.  It was really supposed to be a practice image.  I pulled out some colors that I knew would blend.  Then when I got this big flower done and decided I liked it, I wasn't sure how to use it. I'm kind of a small-little-groupings cardmaker - these big things stump me.  Fab Friday to the rescue!

The fabulous design team for Fab Friday are Stampin' Up demonstrators although it's OK with them if our cards don't use Stampin' Up products.  I have more than my fair share of SU products and I felt a tad guilty not using them. So at the last minute, I added a background using the  Stampin' Up Tasteful Textiles embossing folder! I like it - it gave it a nice soft look. The pinkish color is also Stampin' Up - I adore Flirty Flamingo - which is amusing because #1 I don't like pinks and #2 when I read other blogs I notice that many others actively dislike it!

This was fun and so much easier than I would have expected. I think I'm going to go try some different color combos!

SUPPLY LIST

Stamps: Avery Elle Simple Sentiments

Stencil: Pinkfresh Garden Florals set 

Dies: Pinkfresh Garden Florals, Taylored Expressions Stitched Rectangles, Scalloped Rectangles

Cardstock: Stampin' Up Flirty Flamingo

Other: Stampin' Up Tasteful Textiles Embossing Folder, Pretty Pink Posh Marigold jewels