
Taylored Expressions has the perfect line of products to create calendars. Recently, they have done a series of posts showing each type of calendar: a desk calendar (with a wonderful new set of border dies), a mini-tear off, a 3x4 calendar, then they used my calendar (which I'll detail more below) to show their 5x7 calendar.
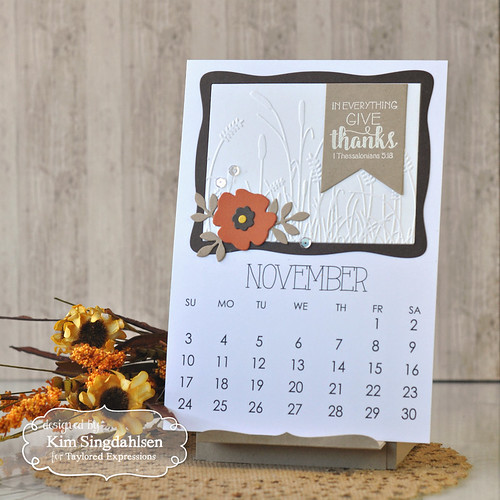
Here's an example of the 5x7 calendar:
This year I decided to use embossing folders to easily add impact. (For years, I ran a church card making ministry. We could have 40 ladies in an evening - usually 30 of whom had never made a card. I found it surprising, but the "technique" that they found almost miraculous were dry embossing folders. I think as a long-time crafter, I knew embossing folders were easy so it seemed like nothing to marvel at. But this group always got wide-eyed at the results. So how perfect for this calendar project!)
Then I decided to use the Be Still stamp set. It was specifically created with 12 months of verses! Finally, for a pop of color, I added a flower from the Bloomers collection.
I laid out each of the 12 months on my desk - decided on an embossing folder, a verse, a flower and colors. From there, I could do an assembly line!
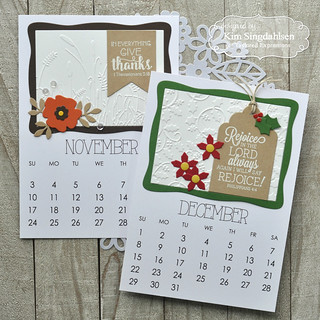
Here's what I came up with for each month - scroll on through because I have some other tips and hints at the bottom.

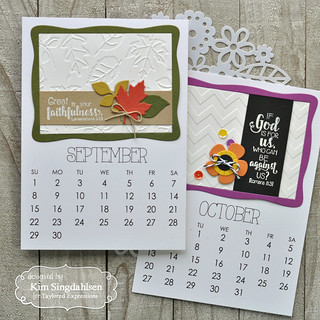
- I used a variety of banners, tags and cardstock strips to add variety. It would be faster just to use strips of cardstock to avoid die-cutting, in other words, do them all like September and October. It still looks fabulous!
- If you do cut tags, stamp and heat emboss the sentiment first, then cut them - it's much easier to line up a die (because you can see through it) - than using a tool to get the sentiment stamped straight on a pre-cut tag.
- The next time I do this, I probably won't heat-emboss the sentiments. I love the look, but it's seriously time-consuming. I'd do the sentiment strips in basic Sugar Cube, then I'd stamp them in a coordinating color to the frame. That would definitely speed up the assembly line.
- For the assembly line - I cut the frames from Build a Scene - Calendar - 5x7, then I cut the inside of the frame with Sugar Cube to give me the panel to emboss. It would have been much easier to just use my paper cutter to cut the insides instead of running the die through 12 times. The inside is 3x4. Another option is to cut the insides a scant 3 1/4" by 4 1/4" so that the frame sits on top and gives some dimension.
- Of course, I did this for where I live. You could switch up seasons, or Thanksgiving, or skip the 4th of July.
- There are so many wonderful basic embossing folders.... you do not have to have a seasonal folder with so many alternatives.
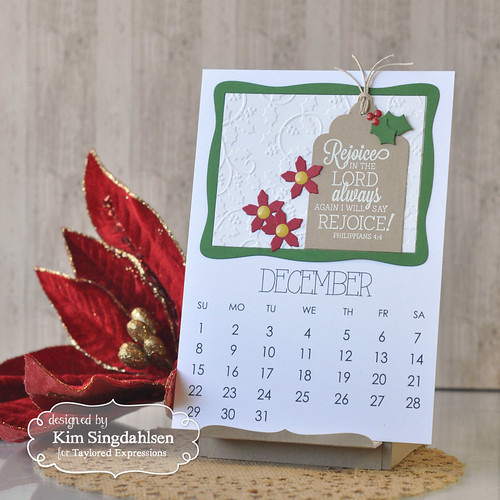
I used the Display Easel dies for a stand. With all of the layers of the cardstock, it's a bit heavy for the easel. I solved that in two ways. First, there's a die for the lip to hold the calendar. Cut two of those, flip one upside down and use it under the regular lip as extra support. If you look just below the "27" on the next picture, you can see just a hint of the cardstock support piece. I also cut two cardstock pieces, approximately 1" x 3" and adhered them from front to back to hold the legs and keep them from sliding apart. (This piece of advice makes more sense if you see the die!) FYI - a clear desktop acrylic frame would make the display of these much easier but be careful of dimension if you use this idea.
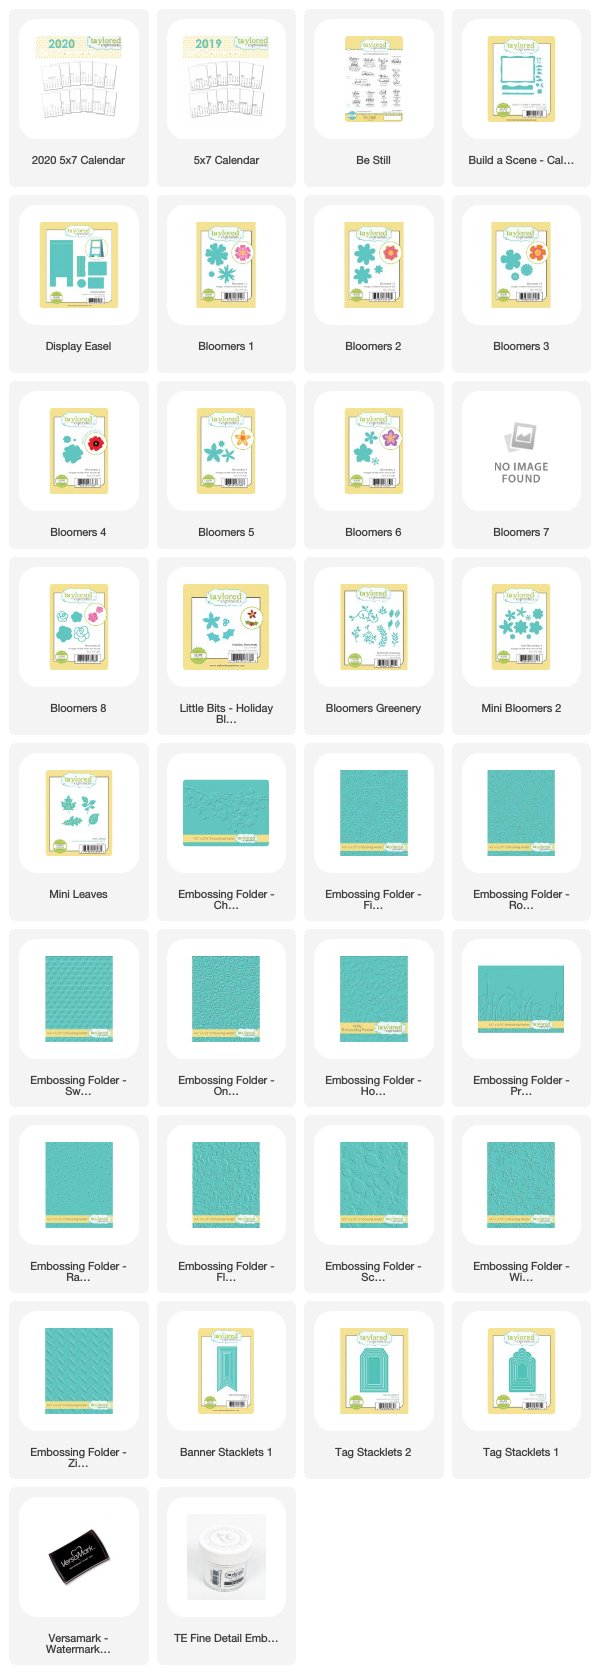
Are you feeling overwhelmed? It's really not as complex as it looks. And once you get it all planned out (and learn from my mistakes), these are really quick and easy but give amazing impact! My supply list is below - but if you want the excruciating details, I have the items for each calendar listed below it.
Are you feeling overwhelmed? It's really not as complex as it looks. And once you get it all planned out (and learn from my mistakes), these are really quick and easy but give amazing impact! My supply list is below - but if you want the excruciating details, I have the items for each calendar listed below it.
2019 5x7 Calendar
Be Still stamps
Frame from Build a Scene - Calendar - 5x7
Sugar Cube Cardstock
Fine Detail White Embossing Powder with Versamark
January:
Sea Salt Frame
Banner Stacklets 1in Earl Grey
Winter Flurry Embossing Folder
Bloomers 6 in Confetti Cake, Salt Water Taffy and Silver Metallic
February:
Lollipop Frame
Tag Stacklets 2 in Oreo
Swiss Hearts Embossing Folder
Bloomers 2 in Strawberry Milkshake, Lollipop, Lemon Meringue
Strawberry Milkshake Enamel Shapes Hearts
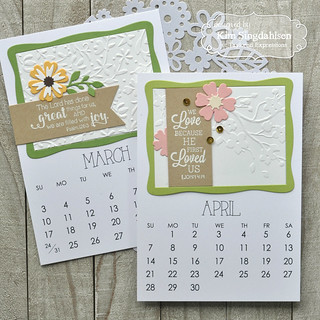
March:
Peapod Frame
Banner Stacklets 1 in Toffee
Floral Vine Embossing folder
Bloomers 1 and Bloomers Greenery in Pineapple, Sugar Cube, Chocolate Truffle and Peapod
April:
Granny Smith Frame
Toffee behind sentiment
Cherry Blossoms Embossing Folder
Base flower from Bloomers 1 and the center from Bloomers 5 using Pink Champagne and Shimmer White (trying to look like a Cherry Blossom!)
Harvest Sequins
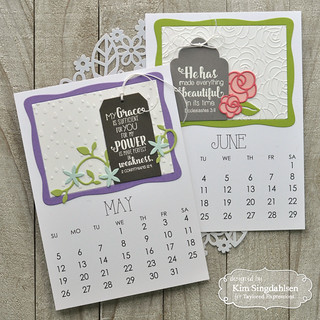
May:
Jelly Donut Frame
Tag Stacklets 2 in Poppy Seed
Raindrops Embossing Folder (I know that April showers bring May flowers - but Easter is in April so I pushed the Raindrops to May.)
Mini Bloomers 2 and Bloomers Greenery in Salt Water Taffy and Granny Smith
June:
Lime Zest Frame
Tag Stacklets 1 in Earl Grey (trimmed to be shorter)
Rosy Posy Embossing Folder
Bloomers 8 in Guava and Pink Champagne, Bloomers Greenery in Lime Zest
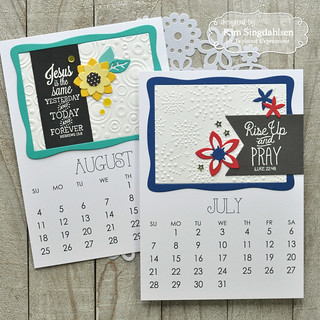
July:
Blueberry Frame
Banner Stacklets 1 in Poppy Seed
Fireworks Embossing Folder
Bloomers 5 and Mini Bloomers 2 in Watermelon and Blueberry
Build a Scene Halloween sequins
August:
Blue Raspberry Frame
Oreo behind sentiment
On the Spot Embossing Folder
Bloomers 7 and Bloomers Greenery in Lemon Meringue, Potato Chip, Cookie Monster, Blue Raspberry and Playful Patterns - Black & White
Hello Sunshine sequins
September:
Sweet Basil Frame
Toffee behind sentiment
Scattered Leaves Embossing Folder
Mini Leaves in Dijon, Pumpkin and Sweet Basil (The plan was a year of flowers - but how could I not do leaves for September??)
October:
Plum Punch Frame
Oreo behind sentiment
Zig Zag Embossing Folder
Bloomers 3 in Candy Corn, Lemon Meringue and Oreo
Plum sequin from Build a Scene Halloween, orange sequin from Harvest, yellow sequin from Rainbow Brights
November:
Chocolate Truffle Frame
Banner Stacklets 1 in Toffee
Prairie Embossing Folder
Bloomers 4 and Bloomers Greenery in Sweet Potato Pie, Chocolate Truffle, Lemon Meringue and Toffee
Snow Flurries sequins
December:
Cilantro Frame
Tag Stacklets 1 in Toffee (trimmed to be shorter)
Holly Embossing Folder
Little Bits - Holiday Bloomers in Red Pepper and Cilantro
Lemon Meringue and Cherry Pop Enamel Shapes
What a wonderfully thoughtful gift! I'm sure the recipients love them. I like the idea of giving them the supplies needed to turn the calendar pages into cards. How FUN!!
ReplyDelete