Monday, January 18, 2016

Hey Hello Hi

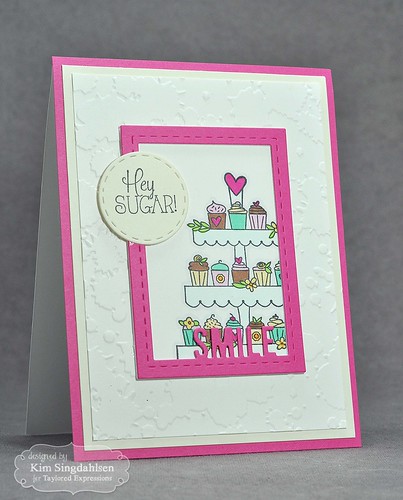
There are so many holidays and occasions on which we have to send cards, I also like sending cards out of the blue. I'm not saying holiday and birthday cards don't have meaning; it's wonderful to send and receive those cards.  But it can be a real day brightener to find an unexpected card in the mailbox. Over the years I've also come to realize that when a little voice in my head says "send a card", I shouldn't ignore it because there have been just enough times when a recipient has commented that my card came just when they needed it most.

For today's card, I just felt a need to check in on a long-time acquaintance that I haven't heard from or about in way too long. I need to call or schedule coffee too - it's on me for letting it go this long - but I was thinking of her early this morning and decided to first send a card.

I pulled out a die set that includes hey, hello and hi word dies and also this old-fashioned phone.  (My friend and I are both old enough to remember rotary phones!)

KimJAN2016NegativeDieCutting2

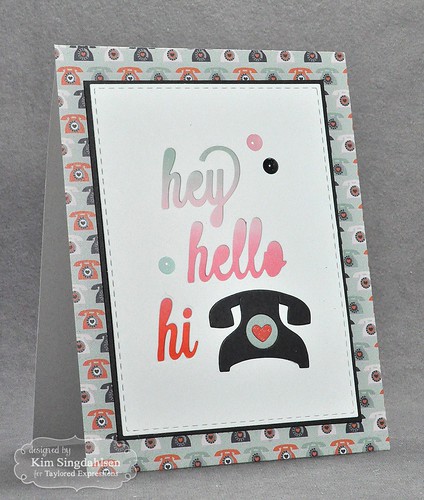
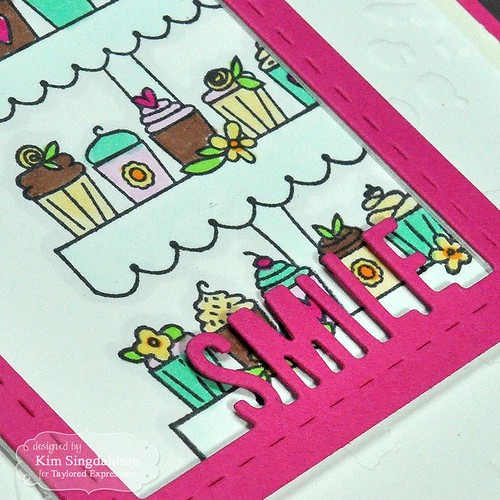
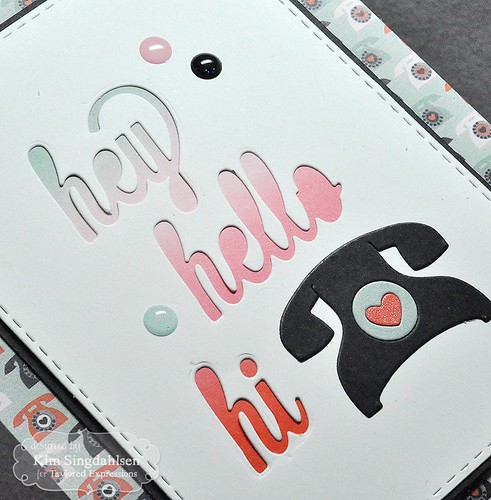
I had the time this morning to step it up just a bit, so I added dimension by using the negative die-cut technique on the words, then added the phone on top - you can see it better on this picture.  I cut a smaller piece of white cardstock and sponged it with a rainbow of colors to coordinate with the paper and adhered it behind the die-cut words.

KimJAN2016NegativeDieCuttingCloseUp2

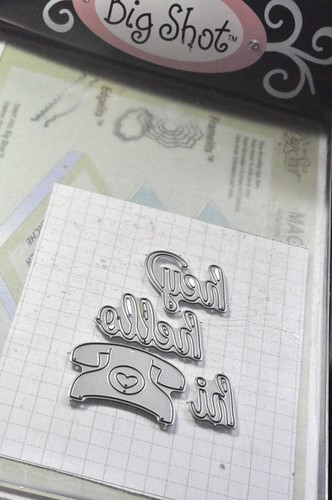
Lining up the dies can be a real pain when you are doing a variety of die cuts directly into your main piece of cardstock.  Here's a picture of how I do it (there are likely better ways, but I've gotten comfortable with this - it works for me!)  I cut a piece of grid paper or graph paper - anything with lines to help line things up - to the same size as the cardstock that I'm cutting. I put it under the bottom plate on my Big Shot, then the cutting plate, then I line up the dies facing up. (Normally I used my Big Shot with the cardstock first and dies facing down onto the cardstock, so this is a unique step for me).  Then I can just place the paper on top using the grid/graph paper to get it straight and I get a perfect cut!  BTW - I added the phone die so I could get the alignment right, then I took the phone die away before I actually cut the paper.

Hey Hello Hi Instruction

Time to get the envelope addressed and find a stamp! 

SUPPLY LIST

The paper is Pink Paislee Switchboard.  

To sponge the colors, I used Distress Inks in Cracked Pistachio, Spun Sugar, Worn Lipstick and Ripe Persimmon.

Friday, January 15, 2016

Curtain Call Inspiration Challenge: From my Girly Heart

It's time for a new challenge at the Curtain Call Inspiration Challenge: Girly.

southmoonunder.com
I'm not heavy into girly supplies.  I do have a couple of sweet little nieces so I have a small stash, but not really enough to follow the inspiration graphic directly.  Instead, I took inspiration from the bead board background (although I should have used the reverse side of the embossed piece to make it true bead board - oops!), the regular placement of the items, and the floral print at the bottom.

CC From My Heart

There is so much to be inspired by in this graphic - I hope to see you playing along!!

SUPPLY LIST

The patterned paper is Memory Keepers Chalkboard but I haven't the seen the 6x6 pad in awhile. The gems are clear gems that I colored with the Copics per the charts on my sidebar.

There's lots more inspiration on each of the designers' blogs! 
Definitely be sure to check out our guest designer for this week!

Thursday, January 14, 2016

Birthday Bouquets and Big Hugs

Birthday bouquets and big hugs to my friend Carol!  Carol's a fellow church-going, knitting, cardmaking, dining out kind of friend.  We both live in the same town and have attended the same church, but also she and her family (husband, kids and grandkids) have a mountain condo the next town over from our condo. It's one of those wonderful relationships where I like Carol, my husband likes her husband (so do I), we like her children, and my kids like her grandkids!

We've made enough cards together that I knew she would prefer a clean and simple card.  I very much wanted to use my Papertrey Ink set - Fresh Floral Wrap-Ups and I offset it with "hugs" because that's exactly what I wanted to send to her.

Birthday Hugs

SUPPLY LIST

The Happy Harlequin set is just for the "birthday" on the tag.

Wednesday, January 13, 2016

Freshly Made Sketches: Get Well Daisy

It's time for a new sketch at Freshly Made Sketches! Today we have a sketch by Cindy Hall.


As much as I love holidays cards - Halloween, Thanksgiving, Christmas, then a quick break before Valentines and Easter - I really enjoy those times when I have absolutely no specific requirements. I started this sketch by digging through my unused stash and found the sentiment. I knew it wouldn't fill the entire center panel, so I added my favorite daisy which I thought would make a cheerful get well!

FMS Get Well Daisy

I love filling in the petals on this daisy with a variety of cheerful colors and patterns, so I decided to go basic black and white with the rest. I love the pop of color - I hope it brings a smile!

I hope to see you playing along this week. Browsing the gallery is a high point in my week.  I learn so much from seeing what each of you do with the sketch!

SUPPLY LIST


Thursday, January 7, 2016

Taylored Expressions Release Day: Dream Big

It's here! All of the new Petite-A-Palooze products from Taylored Expressions are available! Also be sure to head over to the Taylored Expressions blog for a few more sneak peeks and, if you've been leaving comments, see if you are a winner of the giveaways.

I have two more peeks for you.

Check out this charming little fawn.  He comes in the Forest Friends Stamp & Die Combo along with a fox and a woodpecker and three other sentiments. The other new item on this card is the Let's Talk Edger 2.  I immediately saw that sweet little fawn and the cloud shaped speech bubble on a baby card. I found some soft baby-colored paper for the background. I cut the trees using the previously released Birch Tree Border. (I did cut the big branch off the border and I snipped the tops of the trees apart so that some trees went behind the speech bubble and some in front.)

KIMForestFriends2THU

I am just in love with this little guy!  If you've been watching the sneak peeks from the other designers, you've seen this set used in a variety of ways. It's so fun to see what multiple people do with the same set. I love the cards that used all the animals and rich forest colors - it's a versatile set.

KIMForestFriendsCloseUpTHU

I just had to do one more card. On Tuesday, I used the new Picture Perfect - Smile/Hello die with a big bouquet of flowers. But it kept calling my name to use the new Sweet Tooth Tower Stamp & Die combo so here it is! Plus it gave me a chance to use the Splatter Embossing Folder.

TE Picture Perfect Smiles & Cupcakes

So many fun images and dies to put behind the "smile"!

TE Picture Perfect Smiles & Cupcakes CloseUp


I won't chat long - it's time to shop!

SUPPLY LIST

Dream Big


KIMForestFriendsCopicsTHU
Hey Sugar!

TE Picture Perfect Smiles & Cupcakes Copics