Wednesday, March 31, 2021

The Card Concept: Bunny Hugs

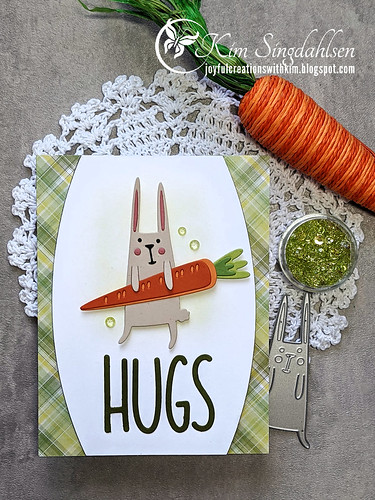
 It's time for a new challenge at The Card Concept.  It's called Celebrate Easter and is a charming display of rabbits, carrots and storage jars!

I was obviously inspired by the bunnies and carrots but also by the tall lettering and the container shapes on my Clean and Layered card.  I love how it all came together!
3.31.21 CC

I was very excited about this one because it gave me an excuse to buy a die set that I had my eye on.  I thought it would be perfect for my son's cards for Easter. They are 21 and 25 so not cutesy but not serious.  I had talked myself out of it partly because I have other choices already in my stash and I wasn't even sure I'd send cards.  My youngest son complains that he has to walk all the way across campus to get my cards (realize he's at a smaller school of only 2,500 students so not a big campus) and it seems to always be blizzarding or pouring rain (he's probably right there - it's on the border of Iowa and Illinois near the Mississippi River and it can get insanely cold).  It's not worth sending him a card unless there are gift cards or other goodies tucked into it.  My oldest is busy trying to figure out how to finally graduate and what to do next in life.  My cards don't get much of a reaction - but this one's going to him.  He really needs hugs!

3.31.21 CC side

I hope to see you playing along with us this week at The Card Concept!

SUPPLY LIST

Dies: Sizzix/Tim Holtz Carrot Bunny, Simon Says Stamp Curved Edge, Concord & 9th Tall Type Alphabet

Paper: Memory Box Madras Plaid Coral and Green, Taylored Expressions cardstock: Candy Corn, Sweet Potato Pie, Granny Smith, Peapod, Sweet Basil and Raspberry Sorbet, Bazzill Natural Stone

Ink: Taylored Expressions Granny Smith (in the background)

Freshly Made Sketches: Alleluia

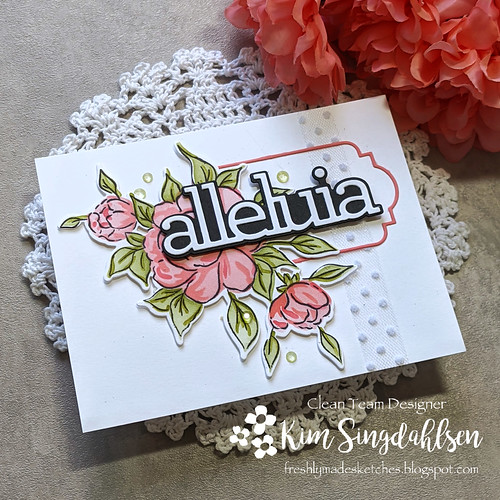
It's time for a new sketch at Freshly Made Sketches! Today we have a sketch by me and here’s what I did with it!

03.31.21 FMS


I have to admit - the idea for the card was in my head when I drew the sketch! Not all of the details, but the idea of a larger flower wrapping around a sentiment panel.  I have a number of these gorgeous stamp/stencil combinations and I am in love with them.  It's such an easy and forgiving way to add color.  You don't get multiple layers in and have a stamp mess things up (or user error) and leave patches unstamped.  You can just keep brushing color until you are happy.  

I needed one more Easter card so I went with a fresh pink color scheme.  Then I decided the bold "alleluia" was just right but didn't fit entirely in the small rectangle in the sketch.  So I let the rectangle go under the flower (because then you'd never know the sentiment didn't fit!)

When I decided to use a frame instead of a solid rectangle, I was a bit stuck on my vertical stripe.  But I recently got this polka dot tulle ribbon and decided it would be a nice accent through the frame without being distracting.

03.31.21 FMS Side

I am so excited to see what you create with this sketch.  The design team's and our player's creativity never ceases to amaze me.  I am in awe of all of the unique and absolutely amazing creations.  Have fun!

SUPPLY LIST
Stamps: Pinkfresh Choose Hope - including the die and the Layering Stencil
Dies: Simon Says Stamp Frames, Alleluia Word & Shadow
Cardstock: Taylored Expressions Guava
Ink: In layering order - Taylored Expressions Pink Champagne, Stampin' Up Flirty Flamingo, Taylored Expressions Guava. Stampin' Up Pear Pizzaza, Old Olive
Other: Studio Katia Peridot Crystals, Stampin' Up Polka Dot Tulle Ribbon

Monday, March 29, 2021

Just Add Ink: Easter Wreath

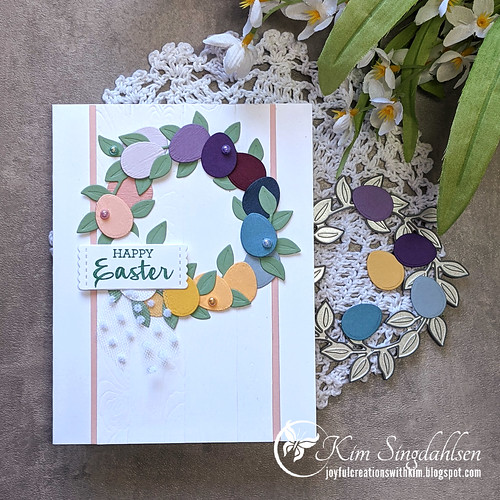
I didn't want to miss the current challenge at Just Add Ink. The image is the prettiest Easter wreath I've seen and with Stampin' Up's Wreath Builder dies retiring - how could I not play along? Clearly I wasn't just "inspired" - I pretty much duplicated that wreath!!

3.29.21 JAI side

I cut a rainbow of eggs.  Then because I liked the texture of the eggs in the inspiration photo, I used the Tasteful Textiles embossing folder on them.  I started with one of the the wreaths from the die set, but I also cut a second wreath and clipped a number of the leaves to fill it in.

I didn't use a pink background but I'm wishing I would have. It added a nice warmth to the wreath in the photo. I did add some woodgrain to the white and at least edged it with some pink cardstock.

03.29.21 JAI

The pearls were to add some elegance.  They are older Stampin' Up and I've colored them with Copics to match the cardstock they are on.

Thanks to Just Add Ink for the inspiration!!

SUPPLY LIST

Stamps: Stampin' Up Arrange a Wreath (just the sentiment)

Dies: Stampin' Up Wreath Builder dies, Stitched Labels

Cardstock: Stampin' Up So Saffron, Daffodil Delight, Apricot Appeal, Seaside Spray, Marina Mist, Blushing Bride, Purple Posy, Highland Heather, Gorgeous Grape and Rich Razzleberry. Wreath in Just Jade.

Ink: Just Jade

Other: Stampin' Up Tasteful Textile and Pinewood Planks embossing folders

Thursday, March 25, 2021

Poppystamps: A Butterfly Hello

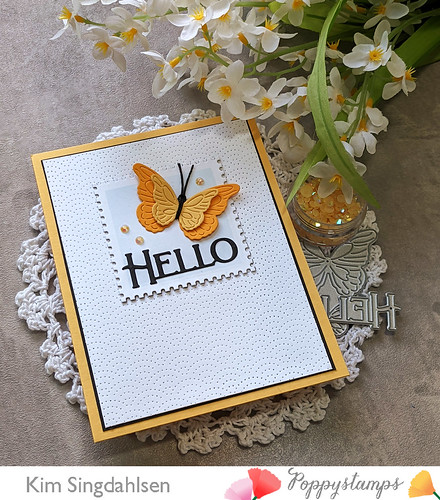
I am on the Poppystamps blog today with this clean & simple card made extra special with the beautiful background, the fun font of the sentiment and the detail on those butterflies!

03.23.21 PS

I love background dies that give detail but still look clean and simple.  These Pinpoint Half Rings can work for so many types of cards - they could be fun (think fish), sweet (think rainbows), or elegant as it is a classic design.

I was inspired by the "cardmaker's postage stamps". (Did you know there's a US postage stamp specifically for square or for lumpy, bumpy cards!)  The first one included a butterfly and now there's a new one with a different butterfly. So I pulled out the Postage Square die and sponged a little bit of blue in the center so the butterfly popped!

03.25.21 PS side

Check out the Poppystamps for more pictures and more details.

SUPPLY LIST

Dies: Poppystamps Pinpoint Half Ring Plate, Intricate Cut Butterflies and Hello Poe Script, Memory Box (Open Studio) Postage Square Layers

Paper: Memory Box Sunny Orange Collection

Wednesday, March 24, 2021

Freshly Made Sketches: Oval of Flowers

It's time for a new sketch at Freshly Made Sketches! Today we have a sketch by Jen Timko and here’s what I did with it!
 
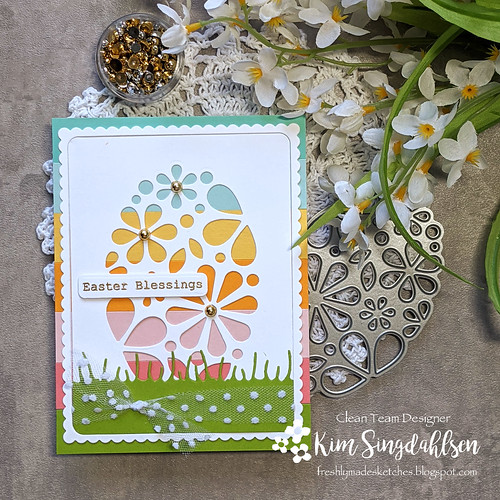
03.24.21 FMS


Easter snuck up on me this year so I definitely knew I would go in that direction. I took a few left turns on this card. I started out with three crosses silhouetted at the base and the stripes that are on my current card (minus the green) was the sunrise behind it.  The card had amazing potential but #1 I ripped the silhouette I had already die cut and #2 the cross die has totally disappeared. I went through everything in my trash can - no die.  It's possible the cat walked away with it.  It's also possible it got tucked in between other things I had out and years from now I'll pull something out and there it will be! But for today, I had to switch directions.

I have this oval of flowers that seemed very much like an egg.  I added the green strip and the grass and a scalloped frame - and I think I like it better than where I started!!

03.24.21 FMS Side

I hope to see you playing along with us at Freshly Made Sketches!

SUPPLY LIST

Stamps: Memory Box Springtime Typewriter Sentiments

Dies: Simon Says Stamp Oval of Flowers, Frames

Cardstock: Stampin' Up Coastal Cabana, Daffodil Delight, Mango Melody, Flirty Flamingo, Granny Apple Green, Papertrey Ink Aqua Mist, Taylored Expressions Cupcake

Other: Stampin' Up Polka Dot Tulle Ribbon, Studio Katia Gold Foil Pearls

Sunday, March 21, 2021

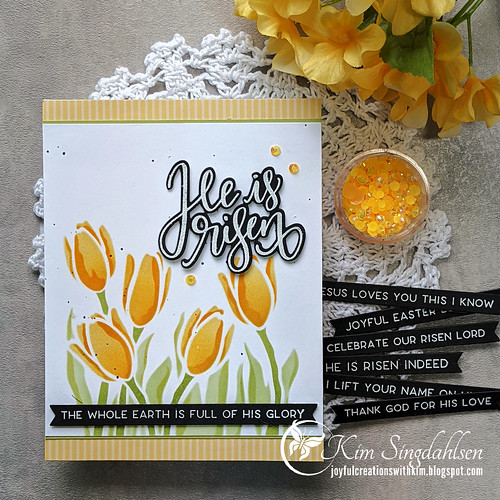
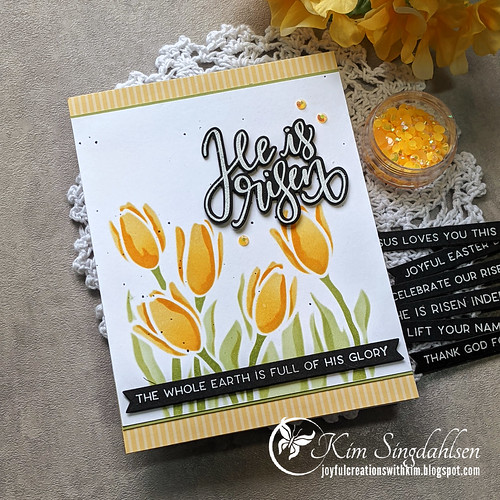
CAS Colours & Sketches: He is Risen

 The colors at CAS Colours & Sketches inspired me to give another new-to-stencil set a try - the Simon Says Stamp Layered Tulips.  I don't know why it took me so long to jump on the stencil trend, but as soon as they started coming up with fabulous layered stencils, I'm totally on board! It is such an easy way to add color - and to add it with shadows and dimension.

03.21.21 CAS Colours

The first stencil is Saffron with a bit of Mango sponged at the base of each flower, then I stenciled the detail layer in Mango.  All of the bottom layers are Pear Pizzazz but I did a light layer of ink, a medium layer and the darkest layer on the stems.

I hadn't thought ahead past the flowers so I checked my stash and found some new sentiments from Taylored Expressions.  The big sentiment is Handlettered Easter which isn't new - but the dies are!!  I adore the look of cut out sentiments.  The strips are a new addition to the fabulous Simple Strips line - it's Easter Blessings.  The picture shows just a handful of the various sentiments that you can cut out all at once!

03.21.21 CAS Colours side

Thank you to CAS Colours and Sketches for the inspiration!

SUPPLY LIST

Stamps: Taylored Expressions Handlettered Easter and Simple Strips Easter Blessings

Dies: Taylored Expressions Handlettered Easter dies, Simple Strips die

Ink: Stampin' Up So Saffron, Pear Pizzazz, Mango Melody

Paper: Stampin' Up Pear Pizzazz CS and the old So Saffron dsp

Stencils: Simon Says Stamp Layered Tulips

Other: Fun Stamps Journey Black Licorice Silk (for the splatters)

Friday, March 19, 2021

Slimline Embossing: Happy Birthday

I have seen other cardmakers do fabulous things with regular sized embossing folders on slimline cards. I've even seen them line them up and manage to cleanly cover the entire front of the slimline.  For me - it's always an epic failure.  I can't line things up straight and then there's the fact that the edges of the folder squish the already embossing portions making them look flatter.  I have no idea how others are doing it.

So imagine my excitement when I saw someone come out with a slimline embossing folder.  There have probably been others but it's the first that I've seen - Spellbinders Slimline Flora.

03.19.21 Slimline Happy

This is for a workmate's birthday today. I don't know her well so while we were both in the office on Wednesday and we were discussing budgeting, I was covertly studying her office.  None of us accounting types have many decorations - just bland, square offices maybe with a few personal photos - but she did have a cover on the back of her chair.  It was Southwestern but in subtle colors.  So I stood there discussing budgets but my mind was ticking through the colors....terracotta, saffron, peacock....!!!

I didn't want to cover the embossing - so went with a simple "happy" and a sprinkling of flower sequins to keep it cheerful.  I LOVE these flower sequins but they are seriously cupped so I assume they wouldn't mail well.  Since I was handing this to her personally, it seemed the perfect time to bring them out.

03.19.21 Slimline Happy side

SUPPLY LIST

Dies: CZ Design (Simon Says) Chunky Happy Wafer Die, Mama Elephant Slim Card Basics (the scalloped edge), Taylored Expressions On Repeat die (the mini banner)

Paper: Stampin' Up Terracotta Tile, Petal Pink, So Saffron, Pretty Peacock, Pool Party

Other: Spellbinders Slimline Flora Embossing Folder, Honey Bee Pocket Full of Posies and Black Gem stickers, Altenew washi