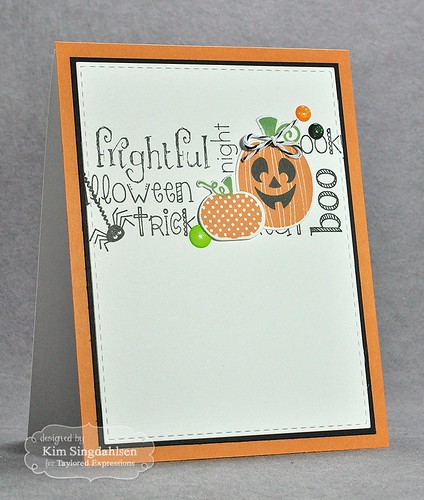
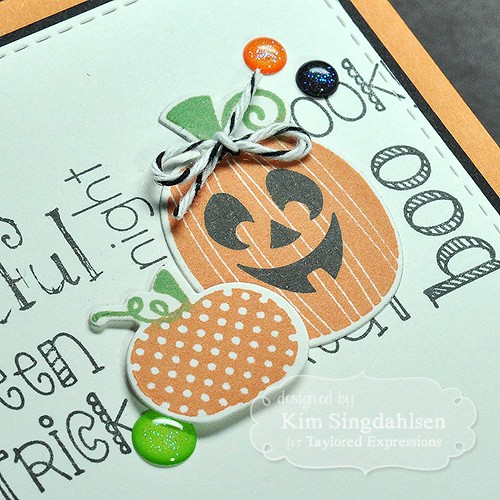
So I kept going with the theme! I've had a Mini MISTI sitting on my desk for awhile. I've had this collage idea for this set of Halloween words in my mind for awhile and finally decided to get more familiar with the MISTI by making the collage.

For the pumpkins, I just used the MISTI to ink up the orange part, stamp it, then without moving the paper or the stamp, I inked up the green part and re-stamped. How easy to get the two colors!

Then I had to line up all of the individual words. It took some time, but this video by Iliana (the queen of the MISTI) showed me how to line up my stamps. I had originally thought I'd line up the entire panel and then stamp one time - but I just couldn't cozy the stamps up as close together as I wanted.
She uses an imaging sheet but I picked up some Quilter's Gridded Plastic Template so I had even more lines to help line things up. You can cut up the sheets as needed - in this case I wanted room at the top for the magnet. (The photo below is somewhat misleading. You always want to cozy things up into the corner of the MISTI so it stays aligned. The printing on the plastic template does not go all the way to the edge, but there is clear plastic template right into the corner of the MISTI - it just doesn't have the printing on it.)
A small tip if you have a Mini MISTI like me - you only have a small amount of space to move the cardstock around, so I added a step to the process. I stamped on the template, then picked it up with the lid like normal. I used the grid on the lid to straighten it out. (You all know how a rubber stamp can look perfectly straight based on the rubber, but the actual image is very crooked.) Then I wiped off the the first stamp on the imaging grid and restamped my straightened image on the imaging grid before lining up my cardstock. By taking the time to straighten it, I only had the nudge the cardstock around to get it all lined up. (This is easier to do than it is to say).
BTW: Iliana also has a video showing how she lines up red rubber which seems like it might be easier but I had a difficult time picking up the imaging grid and the stamp. She makes it look easy so I'm sure the fault is with me.
 |
| I did change the sentiment that I used after I took this picture. |
FYI - there are a lot of MISTI videos out there as to how to line up coordinating die cuts. I can't say that I've had a big problem with that so I didn't use the MISTI. Taylored Expressions has open dies. So I get everything stamped on an extra piece of cardstock, then place it on the bed of my Big Shot and line up the die. You can see right through the die so it's quite easy to line up. Even though I have the magnetic Big Shot I do tend to put a piece of Post-It tape on it to be absolutely certain the die won't move.
So after spending after hours viewing MISTI videos and getting a lot of practice lining up sentiments on this card - I can clearly see that it will be a useful tool. I'm very comfortable with my Stamp-a-Ma-Jig so it will likely still be my go-to tool - but the MISTI definitely has a home on my desk!
SUPPLY LIST

Looks like you've mastered the MISTI...and the resulting card is sheer delight! The word collage, paired with the trio of Halloween images, is fabulous! Clean, crisp and so fun! Great to know that creating fall-themed projects is taking the heat out of your days. I'm getting the Halloween twinge, too....
ReplyDelete~c
Adorable and love the way you created a collage of words. I had my MISTI for months before I even tried it and now I barely make a card without it. Thanks for the link!
ReplyDeleteLove the collage of words, Fabulous card!
ReplyDeleteSuper cute Halloween card Kim! And thanks for the link!!
ReplyDeleteHi Kim! This is a darling Halloween card! Yes, thanks for the link!
ReplyDeleteOh, this is so fun!
ReplyDeleteI love my Misti! It has saved me oodles and oodles of paper, as I totally STINK at lining up stamps without it, lol! Your card is adorable, and those images are the cutest little punkins ever. They look great over your MISTIFIED word collage! The yummy little enamel dots are the perfect finishing touch. Great card! Love it!! Bev
ReplyDeleteP.S. It's been icky hot and dry here too, except for those icky hot and humid days...
Love this card, Kim! What a great idea to mix the words and images into an adorable collage. I love my mini MISTI and will definitely check out the link.
ReplyDelete