Friday, September 30, 2011

I {heart} sketches (and JAI)

Thanks so much to Jen for posting a reminder that it is the last day of the month and time for a new sketch challenge.  I cannot believe I almost missed September because (1) I haven't missed a sketch yet this year and (2) I actually ordered stamps JUST for this challenge.

The sponsor this month is Skipping Stones Designs - a company out of South Dakota - my home state!!  I have wanted this set for some time so it was a great excuse to order.  You should have seen my happy dance when it came postmarked Rapid City, South Dakota - my home town!!

I needed some help with colors for this card.  I had actually decided I simply didn't have time to make any cards today - so whatever I made had to go quickly.  I scanned this week's challenges looking for something with Crumb Cake and Just Add Ink had it.  Unfortunately, it also included Calypso Coral which is at the top of my "problem" colors - it's so in-your-face, I have a terrible time including it.  I tried to mute it on this card by using white ink.


  • Stamps: Skipping Stones Heartsong
  • Paper: Stampin' Up Pool Party, Calypso, Crumb and white
  • Ink: Stampin' Up Pool, Calypso, Crumb and Papertrey White
  • Accessories: Cuttlebug embossing (on Crumb), Sizzix/Tim Holtz embossing (on Pool), Stampin 'Up Crumb Cake seam binding and Antique brads, Nestabilities circle and lacey circle

Thursday, September 29, 2011

OLW: Show and Tell with Janelle

Susan's One Layer Wednesday challenge is to CASE a card from Janelle's Show and Tell blog .

If you haven't been to Janelle's blog - be SURE to get there.  I sat down yesterday morning with my first cup of coffee and two hours later was still reading.  Besides sharing beautiful cards, Janelle shares her journey with brain cancer.  She is doing it with courage, grace, humor and incredible faith.  She was diagnosed August 1, just before her daughter's wedding, but instead of feeling sorry for herself - she is sharing her bald spot and her "selfishness" regarding pork sliders and the claustrophic mask she has to wear for treatment.  And, each day, she includes scripture that has inspired her.

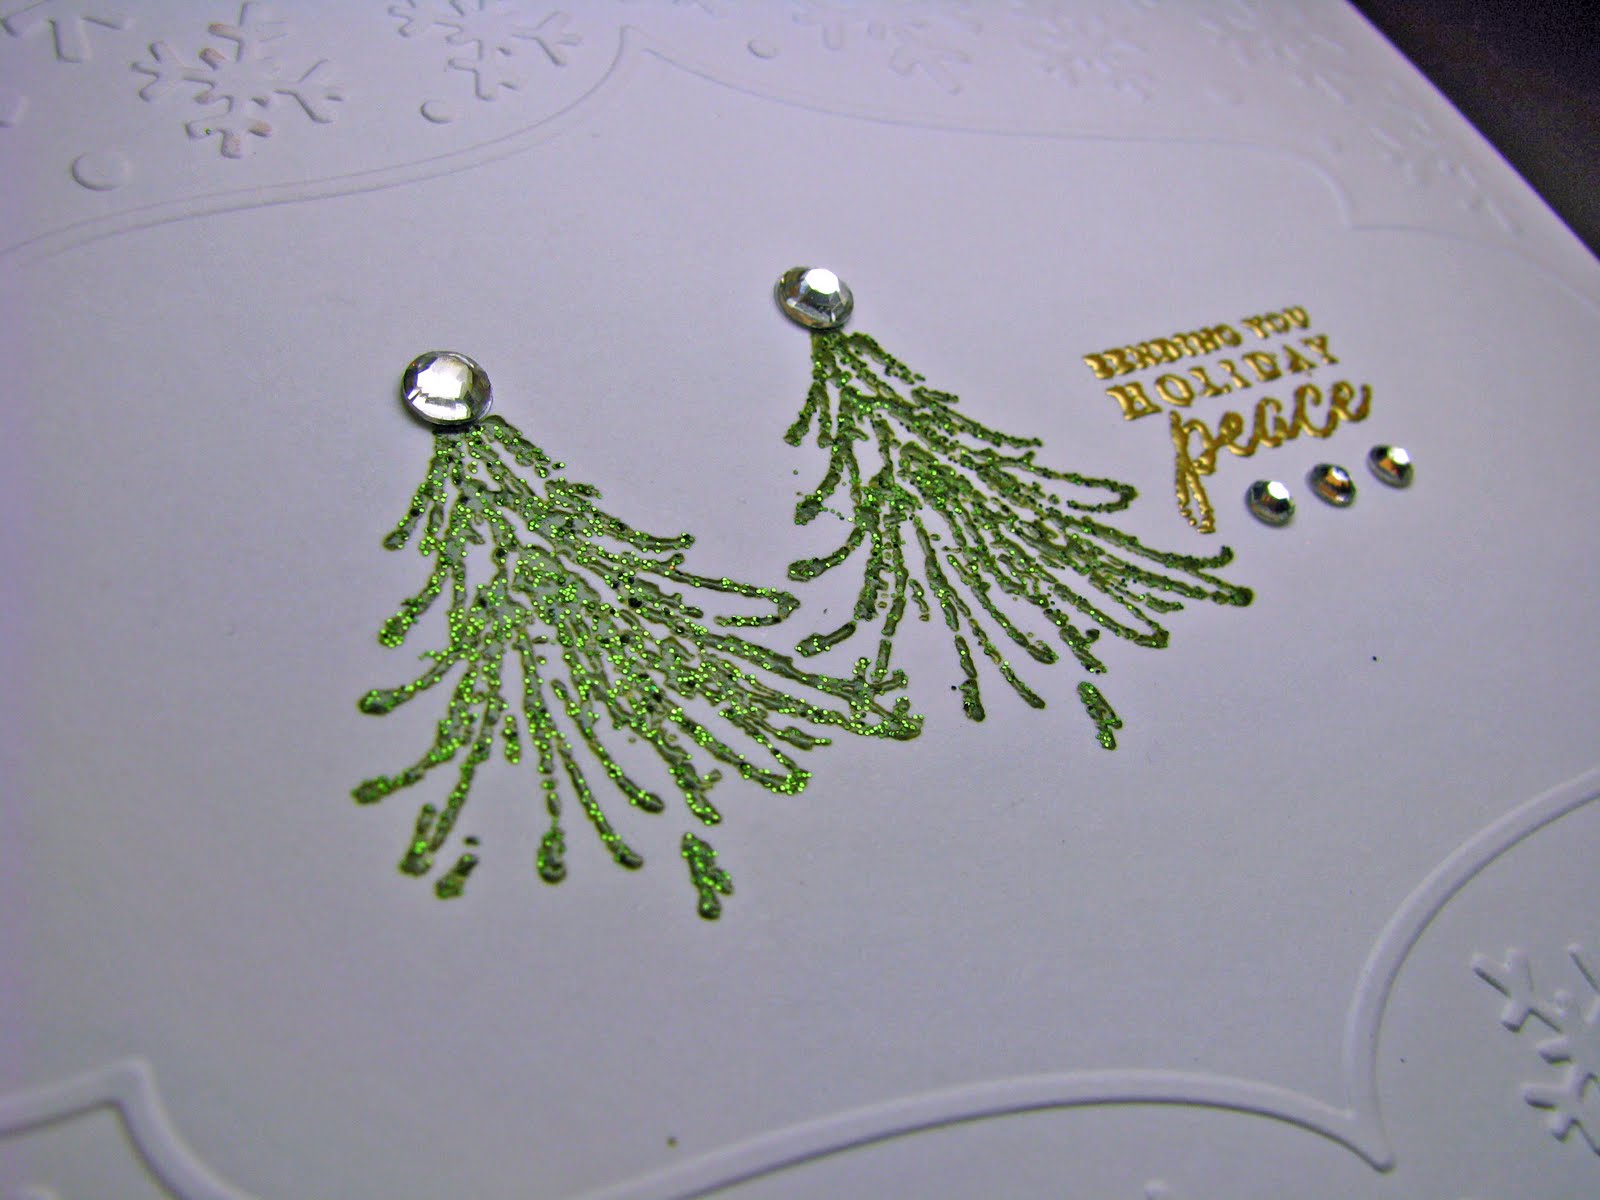
I found many, many cards that I want to CASE - but I want to do them exactly as they are which have multiple layers.  The challenge is to do a One Layer card - so I settled on this card (which I also want to do exactly as is with the ribbon tags) - but for today I was inspired by the black and white with the brilliant splashes of color.  Plus this card had the additional advantage of getting one more set out of my over-flowing box-of-stamps-that-will-not-be-put-away-until-they-are-used!


I use my Nestabilities dies as a stencil to draw frames.  It was amazing for me when the lightbulb came on and I realized I had a fantastic source of squares and rectangles!!


Now...I want to include some technical blog chatter.  (Just skip to the bottom if you only want the card recipe!)

A number of blog readers are saying they suddenly can't comment on some blogs. I've had the problem, so let me share a few things that I found.  I haven't completely solved the problem at my end, so if anybody knows more than I do - maybe we can conquer blogger by working together!!

In August, I started getting the warning "Your current account does not have access to view this page" while I was simply trying to comment.  These are blogs that I have commented on in the past - so I couldn't figure out what was happening.

I found this entry in the Blogger Help forum.  It seems a lot of people started having this problem in August!
Of course, these computer advice articles are always written in a language that I haven't mastered - but I figured out two things:

1) The blogs that can't be commented on have an Embedded Comment Form (vs. a Pop-Up).  I double-checked the blogs that I was having problems with and none of them were pop-up.  At this point, I did change my blog to a Pop-Up comment window so others didn't have a problem with mine.  (In Blogger, go to Settings, Comments and you can select the type of comment form.)

2) When someone cannot comment, their computer is having a problem with "authentication and cookie-filtering".  I am definitely already out of my comfort zone - but I do know this is my problem because I also have problems with two on-line stores and I get a "cookie usage" problem.  It's just too coincidental that two things have "cookie" in their problem description!  (See if you can put things in the cart at All That Scraps and Crop Stop - if you get cookie usage problems - we are in the same boat!)

I did try the remedies selected in the article but it didn't solve things for me.  And I have tried the remedies that come up with those online stores (in Internet Explorer, select Tools, Internet Options, Security and change your security level).  But...my security level is set at medium, which is the lowest mine will go.

Personally, I didn't research any further.  I do most of my blog commenting on my iPad which doesn't have the problem.  And I can always order from those stores on my iPad so I have an easy work around.

If anybody has dealt with this - or is inspired by my description to research further - let me know what you find out. 

Hope this helps someone!

  • Stamps: Stampin' Up Printed Petals, Papertrey Signature Greetings
  • Paper: white
  • Ink: Stampin' Up markers in Pure Poppy, Daffodil, Limeade, Pacific and Orchid
  • Accessories: gems colored with copics, square nestabilities

Wednesday, September 28, 2011

Cards for First Communion

My pastor asked me a few weeks ago to do 24 cards for our kids who are taking their first communion this weekend and, of course, I waited until the last minute.

I find this type of card so difficult to do - a serious occasion...for kids (5th grade)...for boys AND girls.  I want a few special touches on the card, but yet I have to make a lot of them so they need to be quite straightforward.

I have definitely felt better about my first communion/confirmation cards in the past.  I like this card, but I think it fails in the "appealing to kids" category.  But...as my husband pointed out...the kids will see it for about 10 seconds, then their parents will decide what to do with it!

  • Stamps: Club Scrap Sacraments, cross is Clear Dollar Designs
  • Paper: Stampin' Up Rich Razzleberry, black and white
  • Ink: Black
  • Accessories: Cuttlebug border embossing, Stampin' Up Razzleberry ribbon

Tuesday, September 27, 2011

OLW Sentiment-a-mania with a Sketch

This week's One Layer Wednesday challenge is to create a card where the sentiment is the focus or shares the focus equally with the image.  Less Is More has a sketch for us this week.


I came home from Archivers yesterday with a Christmas sentiment stamp that I needed like a hole in the head, but it was so unique and stylish - a set designed by Ali Edwards at Technique Tuesday.


I knew that I wanted to use that first sentiment with a star in the upper corner, but my CAS card has taken me hours!  First I tried glitter paper and a Christmas star punch - broke the punch, and the star looked lost by itself. 

Then I tried a few dozen ways to add a blue square - punching, sponging, glimmer misting, etc. - when I finally hit on this technique to ink an acrylic block - I was thrilled!

But then came the simple little star.  The glitter paper was too gold - it needed to be whiter, so clearly I would just add glitter.  Have you really looked at different "white" glitters?  Some have a pink cast, some blue, some are too white with no glitz, some show dark flakes.  Yuck!  I cannot tell you how many glittered stars I have on my desk - not to mention the glitter on my PJs, carpet and even eyebrows!  The final star - which is NOT my Christmas star punch as that broke at the beginning of this saga - is a combo of Crystal Effects (or Glossy Accents) covering the star with some no-brand glitter all over it. 

I wanted the sentiment to be slightly sparkle - a "moonlit" sparkle - so after I stamped it, I just sprinkled it with the same glitter - no embossing powder or heat-and-stick - and enough flakes stuck to give me the effect.  You know how glitter sticks to everything - I don't know how long it will stay, but so far it has resisted me trying to blow it off.

So...now that you are thoroughly tired of me whining - here's the card.  I really like it - but it definitely wasn't worth the hours I put it on it - particularly given that it should have been a 5 minute card!!


  • Stamps: Technique Tuesday Good Cheer
  • Paper: white
  • Ink: Ranger Distress Inks in Tumbled Glass, Stormy Sky and Faded Jeans
  • Accessories: Emaginations Star punch, glitter, Stampin' Up Crystal Effects

Sunday, September 25, 2011

Papertrey Blog Hop: Bells & Boughs

Today is the monthly Papertrey Blog Hop and this month they included a fun and unique photo inspiration:


I just received a PTI order yesterday and given that I have the goal of using stamps from THE box of yet-to-be used stamps - I had to usee these stamps before they even made it into THE box.  Plus I used a Fillable Frame set that had been hiding in the box for awhile now!


My main inspiration was the colors - a group of colors that I would never, ever have put together!  I did start out working with the graphic lines, but the only thing that survived from my first "inspiration" was the Cane Print background.

I added some gold shimmer spritz to the Autumn Rose medallion and the bells.  I wanted it on the Autumn Rose because it seemed like such a strange color in this mix.  I thought the gold would change it enough to fit in, but as you can see, you can barely see the gold and I think the Rose still blends!  What a great inspiration piece!

  • Stamps: Papertrey Bells & Boughs, Christmas Blessings, Fillable Frames #10
  • Paper: Papertrey Smokey Shadow, Autumn Rose, white
  • Ink: Papertrey Hawaiian Shores, Summer Sunrise, and inks to coordinate with Harvest Gold, Pure Poppy and Smokey Shadow
  • Accessories: Papertrey Bells & Boughs dies, Fillable Frames #10 die, Doily Details Die, Cane Print Impression Plate, Hawaiian Shores ribbon

Friday, September 23, 2011

Color Throwdown for Less Is More

I have had this Cuttlebug embossing folder and the Ribbon Banners set aside as a great match for an elegant CAS card.  I had envisioned a beautiful floral, but...if you have been reading my blog...I am challenging myself to make a huge dent in my box-of-stamps-that-will-not-be-put-away-until-they-are-used and there is not an appropriate flower in that box.  But there is a set of beautiful crosses and with this week's Color Throwdown challenge, it all came together!


I am also using this as my ninth card for the Less Is More challenge to get 1000 entrants.

  • Stamps: Stampin' Up Crosses of Hope
  • Ink: Stampin' Up Early Espresso
  • Paper: Stampin' Up Very Vanilla, Regal Rose, Early Espresso
  • Miscellaneous: Cuttlebug embossing folder, Nestabilities Ribbon Banners, gems colored with copics

A final push for Less Is More

I had planned to spend the evening working on more CAS cards for the Less Is More to post 1000 cards, but I just popped over there and it turns out that it closes in an hour.  I keep forgetting that there is a substantial time change between where they are and where I am.  So I'm not going to be a huge help as I can only get a few done and posted - but I'll try!!

This card is for my brother and his wife on their anniversary.  They had a fall wedding and kept the whole theme beautifully autumnal - so I always keep their cards on the same theme.

  • Stamps: Gina K Arranged with Love
  • Paper: Stampin' Up Very Vanilla and Cajun Craze
  • Ink: Stampin' Up Cajun Craze
  • Miscellaneous: gold leafing pen, gold twine, ribbon from Hobby Lobby

Thursday, September 22, 2011

The Paper Players: CAS Animals

The Paper Players challenge this week is to make a CAS card with plants or animals.  This worked out perfectly for me because I have a darling dog stamp set in my overflowing box-of-stamps-that-will-not-be-put-away-until-they-are-used.  I am embarassed to admit how long the set has been there...suffice to say it's not a matter of weeks or even months!


It's hard to see in the picture, but the little argyle dog has some fancy bling!


I'm also going to add this to the Less Is More challenge which is simply to get 1000 entrants!

  • Stamps: Gel-A-Tins Cosmo Pups
  • Paper: black and white
  • Ink: Memento black, Stampin' Up Poppy marker
  • Accessories: Cuttlebug embossing folder, Nestabilities hearts and scalloped hearts, ribbon from Michaels, misc red gems

More Less Is More: Creative Elements

I'm still trying to help Less Is More reach their goal of 1000 CAS cards this week!  I spent yesterday afternoon at a friend's house who actually has MORE stash than I do.  Typically I spend my time CASing her phenomally detailed cards, but at the last minute I decided I better throw a CAS card in the mix.  I pulled out her Stampin' Up set Creative Elements.  Everything that I have seen with this set has been very vintage and layered - so I tried to make it clean & simple.


I added some stickles in the circles for just a touch of shine!

  • Stamps: Stampin' Up Creative Element, sentiment is also Stampin' Up but I didn't look at the name of the set
  • Paper: Stampin' Up very Vanilla
  • Ink: Stampin' Up Old Olive, Cherry Cobbler, Basic Gray
  • Accessories: Stampin' Up gems colored with copics, Lime Green Stickles

Wednesday, September 21, 2011

Another CAS card with DeNami

Earlier today I put up a CAS card with DeNami stamps that I had CASed from a fabulous cardmaker.

When I ordered the stamps to CASE that card - I ordered other stamps.  This card is all mine!!!


I trimmed the center of the image out to make a window.


The simple "congratulations" comes from Stampin' Up's In My Thoughts.  The words on the stamp are actually reversed - the "congrats" is at the bottom - so I simply used post-it notes and a stamp-a-ma-jig to put it together a different way.


BTW - This stamp, the one from the earlier post today and the snowman on this card are the three stamps that I got in my order from DeNami.  The snowman card shows up on my 10 most viewed posts list.  Good stamps, huh?
  • Stamps: DeNami Designs Rosebud Word Plate, Stampin' Up In My Thoughts
  • Paper: white
  • Ink: Black, Stampin' Up Markers in Poppy and Limeade
  • Accessories: Martha Stewart red glitter glue, misc red twine

CASing a CAS Card by Soapbox Creations

I saw a card on a blog, immediately ordered the stamp so that I could CASE it, and then left it all sitting on my craft corner since August 2nd.  With the big push at Less Is More to get 1000 cards posted this week, it seemed like a great time to get these cards done!

The blog is Soapbox Creations.  If you are a CAS cardmaker, you have to read this blog.  Laurie is absolutely amazing at creating unique CAS cards.

Here's my CASE:

The large flower spray is from DeNami Design.  It is fun and interesting enough to hold its own on a CAS card.  The cards on Laurie's blog also use DeNami sentiments which I wish that I would have ordered because their style is a great fit to the flowers.  Mine are random sentiments that I thought fit the image with their weight and style.

I picked up a few other great stamps when I went shopping at DeNami, I'll be back later today with some cards of my own!

  • Stamps: DeNami Large Flower Spray, misc sentiments
  • Paper: white
  • Ink: SU markers, black ink
  • Accessories: misc bling on the flower centers

Tuesday, September 20, 2011

One Layer Wednesday 64: Coloring Country Pleasures

This week's One Layer Wednesday challenge is to "color it".  In going through my box of stamps-that-will-not-be-put-away-until-they-are-used, I really only had one set that fit.  It's a very old Stampin' Up set that I recently picked up used on E-Bay.


I have mixed feelings about this card.  I like the idea of a vivid scene on a white card, but it just came up too dark.  I'd have another try at it, but I am handicapped by the fact that about 3/4's of my Copics are packed in card kits to take up to church cardmaking!  I also had a very tough time getting the sky to blend and getting the barn to look rustic.  But...I like the concept enough to post it!

I'm also going to add this to the Less Is More challenge to get 1000 posts!

  • Stamps: Stampin' Up Country Pleasures, sentiment unknown
  • Paper: Neenah Classic Crest Solar White Cover Stock
  • Ink: Memento black and copics
  • Accessories: red and olive stickes, b/w gingham

Monday, September 19, 2011

Stamping 411 Sketch for my SIL

Tomorrow is my SIL's birthday and I just got a card in the mail today - hopefully I am not in too much trouble.  I tried to take her tastes into account with this card.  Many of her decorative furnishings are black and they showcase marvelous pieces that she has collected in her world travels.  The photos on her walls are artistic black and white shots.  Thus...this card was developed...


It is based on this week's Stamping 411 Sketch.


I then realized how simple it was and thought I would try to "CASify" it!!  I think it works!  I'm going to add this to the Less Is More challenge to get 1000 entrants!

  • Stamps: Stampin' Up Tiny Tags and Well Scripted
  • Paper: 1) SU Black, Poppy, Vanilla First Edition dsp; 2) SU White, Pretty in Pink, Suede
  • Ink: black & suede
  • Accessories: Heidi Grace Cherry Stickers, Fiskars border punch, misc ribbons and embossing folders, also spray adhesive and glitter on the first card.

A CASE Mashup with Leaves!

This morning's card started with the Splitcoast CAS challenge to use leaves.  I also knew there was a fun Friday Mashup out there to mashup "Autumn" and the colors orange and  yellow.  Last but definitely not least, the Less Is More challenge is simply to fill their gallery up with 1000 CAS cards - so you'll see a lot of CAS cards from me this week.

I also have a personal goal to only use stamps from the overflowing, in-the-way box of stamps-that-will-not-be-put-away-until-they-are-used.  Thank goodness - way at the bottom - was a set that I had gotten over a year ago that included leaves!


Each leaf was inked in the lighter color and then one edge was "rolled" on the darker ink pad.


The stamps on this card are from Verve Stamps.  They make very high quality clear stamps.  I recently did this post on getting good images with clear stamps.  One of the comments asked what to do when the clear stamps quit sticking.  That can happen but it is very easy to fix!

A clear stamps loses its ability to stick because of oils from your fingers, dust, and in my case, cat fur, that accumulates on the stamp.  The best way to get it to stick is to use dishsoap - just dip it in some soapy water and rub lightly.  In some ways this seems counter intertuitive, like you would wash away some special "stickiness" - but it does work!!

  • Stamps: Verve Harvest Blessings
  • Paper: Stampin' Up Very Vanilla and Pumpkin
  • Ink: Stampin' Up Daffodil, Pumpkin, Cajun, Suede
  • Accessories: gems colors with copics, Cuttlebug embossing folder

Saturday, September 17, 2011

Freshly Made Sketches: Grateful

I have a box on my desk in my craft corner.  It's an overflowing, in-the-way box of stamps-that-will-not-be-put-away-until-they-are-used.  It's usually a pleasant box of stamps, sparkling clean and full of potential.  But at the point that it starts to overflow, it becomes an incredible irritant.  So...I have a new motto:

Thou Shalt Use No Other Stamps Until THE Box is Empty!!

This is a worthy goal but, of course, completely unobtainable.  Right now, I have orders coming from three places.  But maybe if I stick with it this week, it will no longer be an irritating, overflowing mess!!

FYI: These are stamps that are new to me - not necessarily brand new products.

As soon as I saw this week's Freshly Made Sketch, I knew that I had the perfect fit in THE box.


I used some shimmer paint dabbed randomly on the berries.  Not only does it add shimmer, but it slightly lightens the color, so IRL there is some very nice berry varieties!


This is a new challenge - it's only on sketch 2. The goal is to be clean, but not necessarily simple - this totally works for my style!  Although you can use any product on entry, the design team uses Stampin' Up.  Generally, I would use Stampin' Up because they use it - but...remember...I have THE box staring at me!


I entered last week's challenge and was thrilled to be named a Perfect Princess!!  Who would have thought that this slightly-more-than-middle-aged, a little more than slightly-over-target-weight, bespectacled mom would be a Princess???  It made my day!!

  • Stamps: Papertrey A Wreath for All Seasons, Stampin' Up Cute Converse (sentiment)
  • Paper: Papertrey Fine Linen, Vanilla Cream, Stampin' Up Cherry Cobbler
  • Ink: Stampin' Up Soft Suede and Cherry Cobbler
  • Accessories: Stampin' Up Cherry Cobbler ribbon, tag punch and Frost White Shimmer paint; Papertrey buttons, Cuttlebug embossing folder

Tuesday, September 13, 2011

One Layer Wednesday: Baby

The One Layer Wednesday challenge is back after a brief break with the aptly named challenge, "We're back, baby!"  The challenge was to create a one layer baby card.


There is something on this card that I consider absolutely essential for CAS cards - the oval!!  I have a set of small clear ovals by A Muse.  They are perfect for grounding your image, particularly when you are just plopping the image in the middle of white space.  You can put them under vases of flowers or pumpkins or Christmas trees...or...giraffes!!  I stamped the giraffe, masked his feet, inked the oval, stamped it off once on scratch paper and then on to my card for the perfect ground!!

  • Stamps: Papertrey Ink Sweet Baby, A Muse Ovalicious
  • Paper: Stampin' Up Whisper White (the BEST paper for good images with solid stamps)
  • Ink: Stampin' Up So Saffron, Pool Party, Going Gray
  • Accessories: ribbon from Hobby Lobby

Sweet Stop and Paper Players: Sympathy

I make so many sympathy cards, but virtually all of them go to our church.  Since I do not know who will send them nor who will receive them, it's quite easy to step back and just enjoy the creation of the card.  This time, I have made this card for a friend who just lost her father to complications from Alzheimers.  I had to rely on some of my favorite challenges because I had no good, original ideas how to make this meaningful for her.


The butterfly is one of the new triple punches from EK Success (they also make the new triple punches for Stampin' Up).  I just found this one this morning at Michaels (50% off!)   It's a great deal but be prepared for some frustration if you run out and buy it.  The base butterfly - a solid butterfly - is VERY difficult to punch.  When you squeeze it as hard as you think you can, none of the inner parts of the butterfly are punched.  I googled and when I saw page after page of forum comments, I realize there is a problem with the EK Success Butterfly Layer Punch.  It turns out that for the solid butterfly, you have to push down evenly and very firmly over the entire punch (not just the squeeze part) - or some say they had luck pushing on the back of the punch - when you do this very firmly, you hear a final click and then the butterfly is fully punched.  It is a pain - - but if everybody is having the problem and since I really want the punch, I guess I will just deal with it.

Thanks to the following challenges for helping me through this card.

The Paper Players

The Sweet Stop
  • Stamps: Stampin' Up Thoughts and Prayers
  • Paper: Stampin' Up Razzleberry, Basic Gray, Old Olive CS and dsp
  • Ink: Versamark
  • Accessories: Stampin' Up Embossing Folder, Razzleberry Taffeta, gems, Martha Stewart Doily Tags, EK Success Layering Butterfly Punch

Monday, September 12, 2011

Splitcoast CAS Sketch: Autumn Thanks

Today's Splitcoast Clean and Simple challenge is a sketch. 

I have had this image colored and sitting on my desk for weeks.  I just never quite got around to using it.  It fits the sketch perfectly!

I don't use watercolor crayons very often and I don't know why.  I always bring them out for fall leaves and I love the look.  The colors are quite rich - I simply drew a crayon line with various colors around the inside edge of the stamp.  Then I used a aquabrush to apply water and move the pigment around.


Also wanted to share a typical scene at my house.  This is my teenager messing with my poor cat.  The cat was sleeping so soundly, he stayed with the dishes on him for half an hour!!  Living in a household of boys and men is not always easy!

  • Stamps: sentiment from Papertrey's Flower Fusion, leaf stamp unknown - looks like Stampendous? (FYI: I take all of my rubber off the wood, then I use Aleene's Tack It Over and Over on the back so they cling to acrylic blocks.  I stamp each stamp into a three-ring binder and include the brand name - this stamp is stamped but I didn't include a brand)
  • Paper: Stampin' Up Old Olive CS, Pumpkin and Daffodil dsp
  • Ink: Versamark, Chocolate Chip
  • Accessories: Stampin' Up watercolor crayons in Old Olive, Pumpkin, Mustard, Cajun, Stampin' Up Pumpkin Taffeta, Creations Unlimited Teddy Bear Embossing Powder, misc leaf punch and gems

Saturday, September 10, 2011

Less Is More: Seeing Double!

This week's challenge at Less Is More is:

ONE LAYER CARD
entitled
SEEING DOUBLE
Specifically, the challenge is to use "two" of something.

I started down an entirely different path, but I just couldn't make that card look like the mental image that I had.  I couldn't find a sentiment that worked - but, while paging through my Christmas stamp index for the tenth time, I saw this reindeer, imagined the card, and I am so glad that I went through the initial frustration - because I am really happy with the results!


I just love the "smile" on this guy.  The stamp is a single reindeer which I stamped twice.  The sentiment is actually three "jingles" but I masked off one of them.


Now...here's the card that gave me trouble.  I don't dislike the idea, but I had a vivid mental image of a sentiment to the right that said "Joyful, Joyful" (to go with the seeing double theme!) and, not only didn't I have a sentiment like that, I just didn't have any sentiment that was the right shape and message.  (I actually went so far as to cut up another sentiment that included the word "joyful" within it so that I could stamp it twice, but it was just a boring font and did nothing for the card.)


I stuck this sentiment in as it was the best that I could find.  But at this point, I was frustrated so it's not embossed well and is a little hard to read.


I hope you are all having fun "seeing double"!

REINDEER PAIR
  • Stamps: Inkadinkado reindeer, Studio G sentiment (from $1 bin)
  • Paper: white
  • Ink: Memento black, copics
  • Accessories: Martha Stewart Glitter Glue in Garnet and Yellow Barite
TREE DUO
  • Stamps: The Angel Company Winter Whimsy, Stampin Up To You and Yours (sentiment)
  • Paper: white
  • Ink: Versamark
  • Accessories: Cuttlebug embossing folder, Creations Umlimited Moss Embossing Tinsel, Ranger Gold Embossing Powder, gems

Friday, September 9, 2011

A Freshly Made, ColourQed, Paper Player birthday!

There is a new challenge out there that I think I am going to love!  It's called Freshly Made Sketches - they ask that players make clean, but not necessarily simple, cards and that is exactly how I would describe my style!

This week is their first sketch and to play along I wanted to pull in some other favorite challenges.

ColourQ has an amazing variety of color challenges and include a fun inspirational piece with each one.  This week's colors absolutely reminded me of a girlfriend with upcoming birthday - aren't they just fresh and fun??


And then I had to play along with The Paper Players.  They have a variety of challenges - sketches, colors, themes - and this week was to make a birthday card.  I had really wanted to pull out a true birthday stamp - but my card, as it is, came together perfectly for my friend.


Isn't it amazing how when you already have the colors, the sketch and the theme (and throw in a special friend) - cards come together easily???


  • Stamps: Stampin' Up Garden Silhouettes, Great Friend (sentiment)
  • Paper: Stampin' Up Rich Razzleberry, Lucky Limeade, Pool Party, Cottage Wall dsp
  • Ink: Stampin' Up Markers in Rich Razzleberry, Orchid Opulence and Lucky Limeade
  • Accessories: Stampin' Up Butterfly Embosslit and border punch, Stickles (Thistle), Cuttlebug and Quickutz embossing folders, ribbons from Hobby Lobby, gems colored with copics